Search Knowledge Base by Keyword
Getting Started
This article will cover the two main ways of how to add items from Autodesk® Navisworks® to Verity.
Verity analyzes only the elements the user selects and adds to Verity rather than the entire model. This dramatically reduces load and analysis times. This also applies to scans, which must be selected and added just like geometry. If you don’t add both geometry and scans, the “Analyze” button will be inactive.
Selecting elements in Autodesk® Navisworks®
There are multiple ways to select elements in Autodesk® Navisworks®, all of which are supported:
- Manual selection – Switch to the Select mode on the home tab (or type Ctrl+1 ), and manually select an element by clicking on it. The Ctrl modifier will let you aggregate additional elements one by one.
- Manual selection in the Selection Tree – Select objects, layers, or files. Ctrl and Shift modifiers will let you aggregate multiple selections.
- Window selection – Click the drop-down under the Select mode on the home tab, and click on “Select Box.” This will change your selection mode to an inclusive window selection.
- Selection Sets – Selection sets will let you manually build a list of selected items and then save it for later use. This is helpful if you plan to analyze the same elements multiple times as you add new scans of the installed conditions.
- Search Sets – Search sets let you identify properties of the geometry that you want to select and then save those search criteria for later use. The advantage of search sets over selection sets is that new elements added to Autodesk® Navisworks® will be automatically included in the search set if they meet the search criteria. Open the Find Items window in Autodesk® Navisworks®, and right-click search criteria to identify the elements you want to analyze. Once you have validated the search criteria correctly, select the objects desired; you can save that search in the Sets window.
*If you are new to Autodesk® Navisworks®, it is strongly recommended to head over to YouTube or any of the other numerous web-training venues to learn how to efficiently create, manage, and filter selections in Navisworks.
Adding to Verity
There are two different ways to add your selection in Autodesk® Navisworks® to Verity. The primary option will automatically search through your selection and attempt to identify the individual elements within that selection and add those to the analysis. However, in some cases, the file structure may be nonstandard and this search will not yield the desired results. As such, we’ve added a second method which respects the user selection explicitly.
Add to Verity (Search Tree)
This is the default method for adding elements from Autodesk® Navisworks® into Verity. The software will search based on the user’s selection and identify the first geometry node in that selection and add that to Verity. The intent is to allow the user to select within the selection tree at a higher node (an entire category or level) and to let our software find the individual elements to bring into the analysis. In most cases, systems or groups that do not contain any geometry will be skipped until a geometry node is found – this results in the desired elements being added. However, not all file structures follow this standard. In some cases, the first geometry node is at a group or system level with duplicate geometry at the element level. In these cases, the Search Tree option will add the group or system instead of the individual element. This can be checked by reviewing the elements in the working set in Verity to validate that it added the items desired. There are ways to manage this in the next section, or you can remove the grouped geometry from Verity and instead use the Add to Verity (Selected Node) option described below.
Add to Verity (Selected Node)
This method explicitly trusts the user’s selection and does not search the tree for an individual element node. The intent is to allow the user to define a specific node in the selection tree and add that to Verity at that selected tree level as a single item in Verity. So, if you can select a sub-part of a piece of equipment in Autodesk® Navisworks® manually, you can add just that part to Verity. However, this also means that if you pick the entire architectural file in your selection tree and click this button, the entire architectural file will be added to Verity as a single item. That import may take hours or may crash your computer if the file is large enough to cause your computer to run out of memory. As such, it is recommended only using this option as a secondary mechanism unless you know what you’re doing. Suggested reasons for using the Add to Verity (Selected Node) method:
- Add to Verity (Search Tree) gave unexpected results for a manually-picked selection
- If you are using search sets to select elements by their property values
- If you want to add a system or group of elements as a single item to Verity rather than a bunch of individual elements
Add To Verity (Selected Elements as a Single Item)

This Method allows a user to add any geometry as a single element in Verity. A general use case for this option is when a user needs to put together elements in the same system but not the same node (i.e.. sections of piping and insulation).
The GUID in Verity is applied to each element normally but linked to the Verity Grouped Element in the Verity analysis.
There is currently a known performance issue when loading in extremely large models using this method.
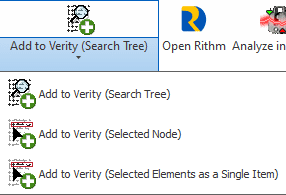
Once you have selected the elements you want to add to Verity, switch to the Verity tab in Autodesk® Navisworks®, and click the Add to Verity button that makes sense for your selection. The Add to Verity (Selected Node) and the Add To Verity (Selected Elements as a Single Item) buttons can be accessed by clicking on the drop-down arrow under the default Add to Verity (Search Tree) button. This will open a project and add the items into an analysis. Once added to Verity, each object will be set up as a unique Verity item, and a GUID will be assigned to correlate that item back to the element in Autodesk® Navisworks®.
You can Add to Verity as many times as you like before the analysis has been analyzed. This allows you to aggregate complex selections without having to know a lot about search and selection sets in Autodesk® Navisworks®. Once an analysis has been done, adding items will require a new analysis to be created.