Search Knowledge Base by Keyword
Getting Started
This article will cover the Verity connection to the host application, Autodesk® Navisworks®. One of the reasons ClearEdge3D built Verity as a companion to Autodesk® Navisworks® is so that it could use the host application as a contextual viewer. ClearEdge3D designed Verity as a robust inspection tool to help you understand what has occurred in the installation of that single item. How that relates to other adjacent elements in Autodesk® Navisworks® is what the connections to the host accomplish. In addition to the view controls that determine how Verity displays the geometry and point clouds, some settings will affect how that geometry is displayed and viewed in Navisworks.
Host View Modes
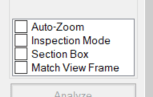
The Host View Mode toggles create a similar experience to those featured in the Autodesk® Navisworks® clash detection tool.
- If checked, Auto-Zoom will attempt to re-orient and fit the view in Autodesk® Navisworks® to the active selection whenever you select items or press the manual Export Selection to Host button.
- Before running Analyze, Auto-Zoom can only pick a view that is focused on and contains the extents of the element. Still, it is highly likely in dense situations that you will be unable to see the element without inspection mode due to other elements occluding it.
- After running Analyze, Auto-Zoom leverages the item’s analysis to pick the best scanner location from which to view the element in Navisworks, and places the camera in that location looking at the element’s centroid. This provides a clear view of the element in a large majority of cases.
- Before running Analyze, Auto-Zoom can only pick a view that is focused on and contains the extents of the element. Still, it is highly likely in dense situations that you will be unable to see the element without inspection mode due to other elements occluding it.
- Inspection Mode will automatically make all other non-selected elements transparent so you can clearly see the selected elements in context in Autodesk® Navisworks®.
- Section Box Mode will turn on the Autodesk® Navisworks® section box and match it to the section box in Verity so you can focus on the immediate context.
- Match View Frame will actively match the camera location and angle in Autodesk® Navisworks® and Verity bi-directionally. Your best results will occur when both applications are in the same type of view (both in orthographic or both in perspective). Coupled with the Scanner View view style, this effectively provides users with a full 360 scan view in Navisworks®.
Import and Export Selection to Host
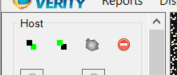
Verity can match the item selection in Navisworks, and vice versa if the need arises. This feature works with single or multiple items and is extremely helpful when using both applications side by side.
Removing Items after running Analyze
Also, you can still remove items from Verity after running Analyze if you find an element that you don’t need for reporting purposes. There is no undo and no way to add items in after running analyze, so do this only if you’re sure you don’t need it. You cannot remove scans after running Analyze.
Export Verity Properties to Host

The Export Verity Properties to Host button will push selected items’ properties from the Analysis to Autodesk® Navisworks®. If you have no items selected it will confirm if you want to push all items’ properties. This button will also colorize elements in Autodesk® Navisworks® based on the color scheme below:
- Pass – Green
- Out Of Tolerance – Yellow
- Uncertain – Salmon
- Occluded – Purple
- Not Found – Red
- Not Enough Data – Teal
- No Data – Also Teal
If you make changes in Verity to an item’s status or property, you will need to push this button again to synchronize those changes with Navisworks unless you have it set to automatically update.
If the lock button in the upper left corner of the push properties button is locked, Verity will push the properties of ALL the items to Autodesk® Navisworks®, and then push each subsequent change in Verity to Autodesk® Navisworks® as it occurs. This includes the colorization of elements in Autodesk® Navisworks®. In this mode, changes you make during the QA/QC process in Verity effectively synchronize in Autodesk® Navisworks® on the fly.
Move Host Item to As-Built

The Move Host Item to As-Built button will push selected items’ as-built locations from Verity to Autodesk® Navisworks®. If you have no items selected, it will confirm if you want to push all items’ as-built locations. This feature uses the item transform in Autodesk® Navisworks® to override the location per element. Pushing the as-built locations into Autodesk® Navisworks® allows you to visually inspect the impact of any erroneous or out-of-tolerance items on the coordinated model, and even run it through clash detection. The transform can be easily re-set in Autodesk® Navisworks® using the re-set transform button. If you make changes in Verity to an item’s As-Built location, you will need to push this button again to synchronize those changes with Navisworks unless you have it set to update automatically.
If the lock in the upper left corner of the button is locked, Verity will push all items’ as-built locations, and then push each subsequent change to Autodesk® Navisworks® as it occurs. In this mode, changes you make during the QA/QC process in Verity effectively synchronize in Autodesk® Navisworks® on the fly.