Search Knowledge Base by Keyword
Getting Started
This article will cover the Verity item table. The first section will be an overview on the bidirectional link, while the second section will go over the fields immediately calculated after item import.
The Verity Item Table
Items or scans added to Verity will appear in the Verity Item Table or Scan Table:
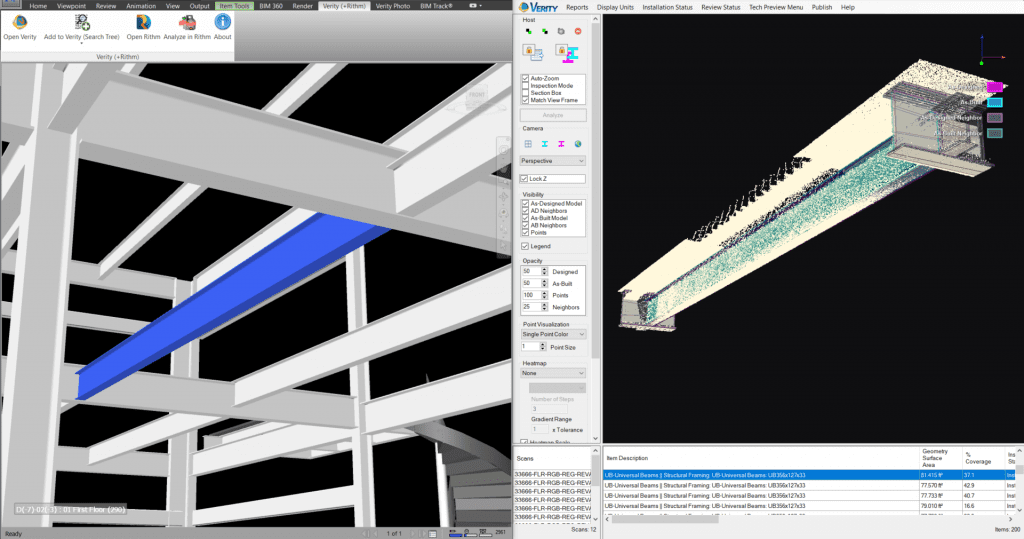
Selecting a scan in the scan table will clear the item viewer and select the same scan in Navisworks®. The Navisworks® view does not update when selecting scans (even when Auto-Zoom, Inspection Mode, or Match View Frame are checked). For that to happen, an item has to be selected. Displayed at the bottom-right of the scan table is the total number of scans brought in from Navisworks®. Selecting an item in the Item Table will then display the geometry of that item in the Verity viewer and select that same item in Autodesk® Navisworks®. The Navisworks® view will automatically update when either Auto-Zoom, Inspection Mode, or Match View frame are enabled (see screenshot below). Displayed at the bottom-right of the item table is the total number of items.
Sorting the Item Table
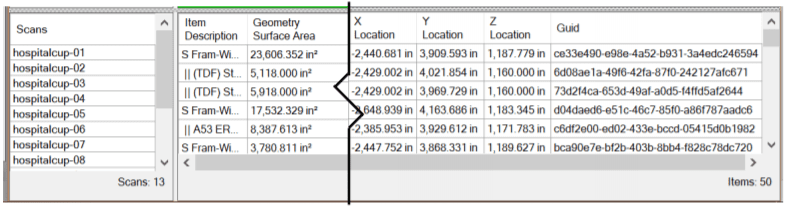
- The item description is based on the selected element’s name in the selection tree in Autodesk® Navisworks®, and you can sort by this description to help identify items to remove. Using the Selected Node add to Verity option will give you more control over what names show up in Verity in the Item Description column. If the names you’re getting aren’t useful, you can also try different exports from the source application to load into Autodesk® Navisworks®.
- The surface area of all the triangles calculates the total surface area for the geometry. You can sort by this column to identify small elements that you don’t need to analyze. Also, you can sort to group identical geometries together.
- We also calculate a minimum oriented bounding box for the As-Designed geometry. The centroid of the bounding box calculates the X, Y, and Z locations of each item in the table . This location correlates Verity’s different reports to the item’s location in the project. It is also useful for sorting as you can group items by Z location, for example, to order them by level for instance.
- You will also see the GUID field on the far-right side of the Item Table. This is the globally unique identifier that Verity adds into the Autodesk® Navisworks® NWF file as an element property. This is to allow Verity to maintain the link between the element in Navisworks® and the item in Verity.