Search Knowledge Base by Keyword
Getting Started
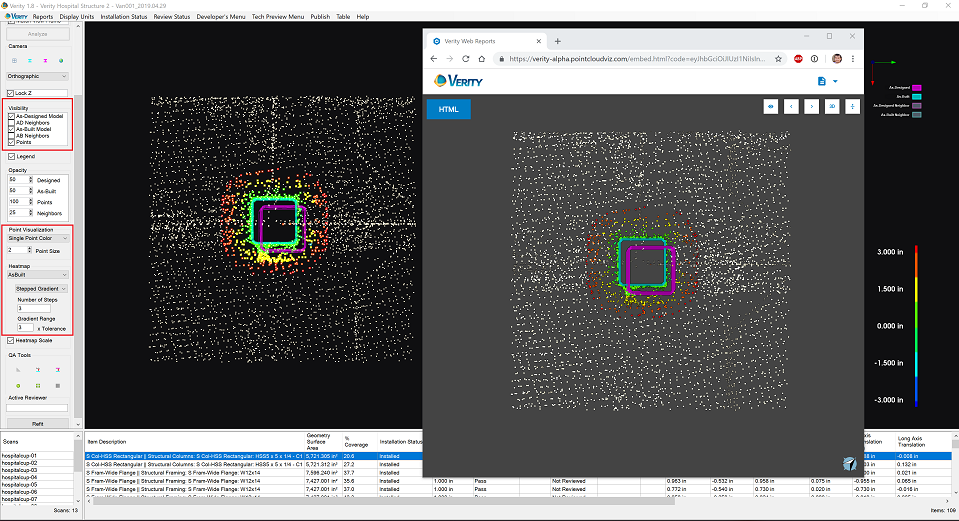
This article will cover the various reports you are able to create from your Verity analysis. You can publish and generate Verity Web Reports from the desktop Verity application. Publishing requires online connectivity. After analyzing, you can access publishing functionality via the Reports tab, and then clicking the Verity Web Report menu.
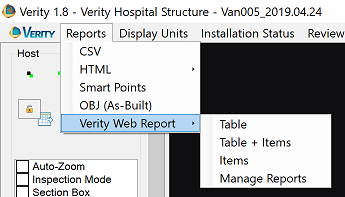
This menu contains three publishing options that closely parallel conventional Verity HTML reports:
- Table
- Table + Items
- Items
Each of these options will publish selected elements to the web, and may also create a local HTML file for navigating through report contents.
Table
The Table option will generate an HTML table of all currently selected elements within Verity. Clicking on an item link in the table opens the corresponding Verity Web Report for this item.
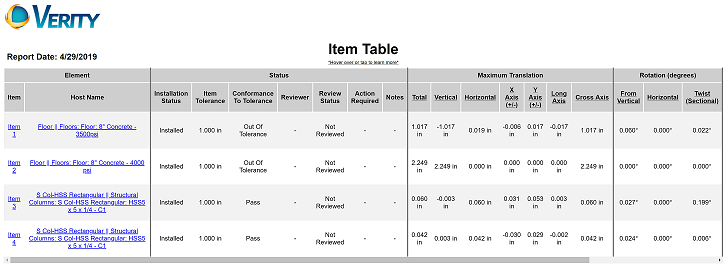
Table + Items
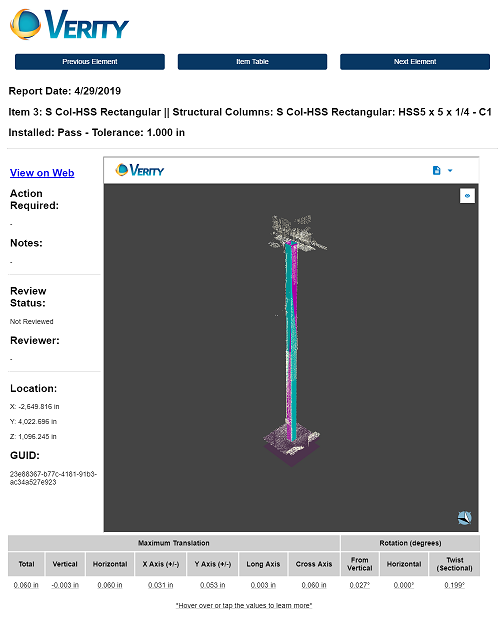
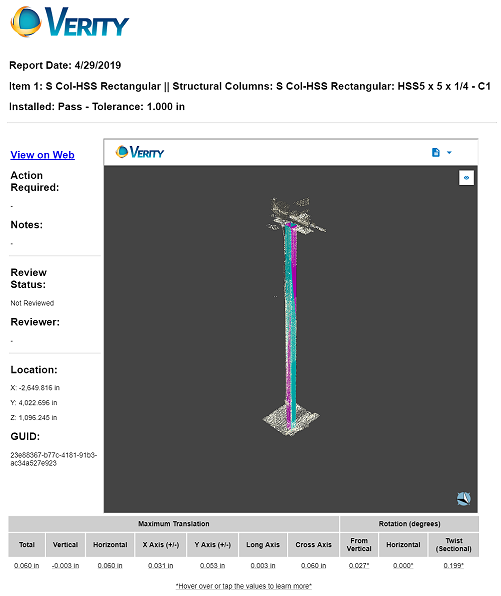
The Table + Items option will generate an HTML table of selected elements. Clicking on an item link in the table opens an individual HTML report for this item. This individual item report contains an embedded, interactive Verity Web 3D viewer. It also contains navigation buttons at the top for jumping to the previous or next elements, and for returning to the table. Finally, clicking the View on Web link opens the full Verity Web Report for this item.
Items
The Items option will generate individual, un-linked HTML reports for all selected elements. Each report is identical to the ones generated by Table + Items option except for the Previous Element, Next Element, and Item Table buttons which are omitted.
Settings
Each report reflects Verity geometry visibility, point visualization, and heat map settings at the time of publishing with the following exceptions:
- As-designed and as-built neighbors of an element will only appear in the web report if they are also selected for publishing.
- Opacity settings are currently ignored.