Load the note into Navisworks
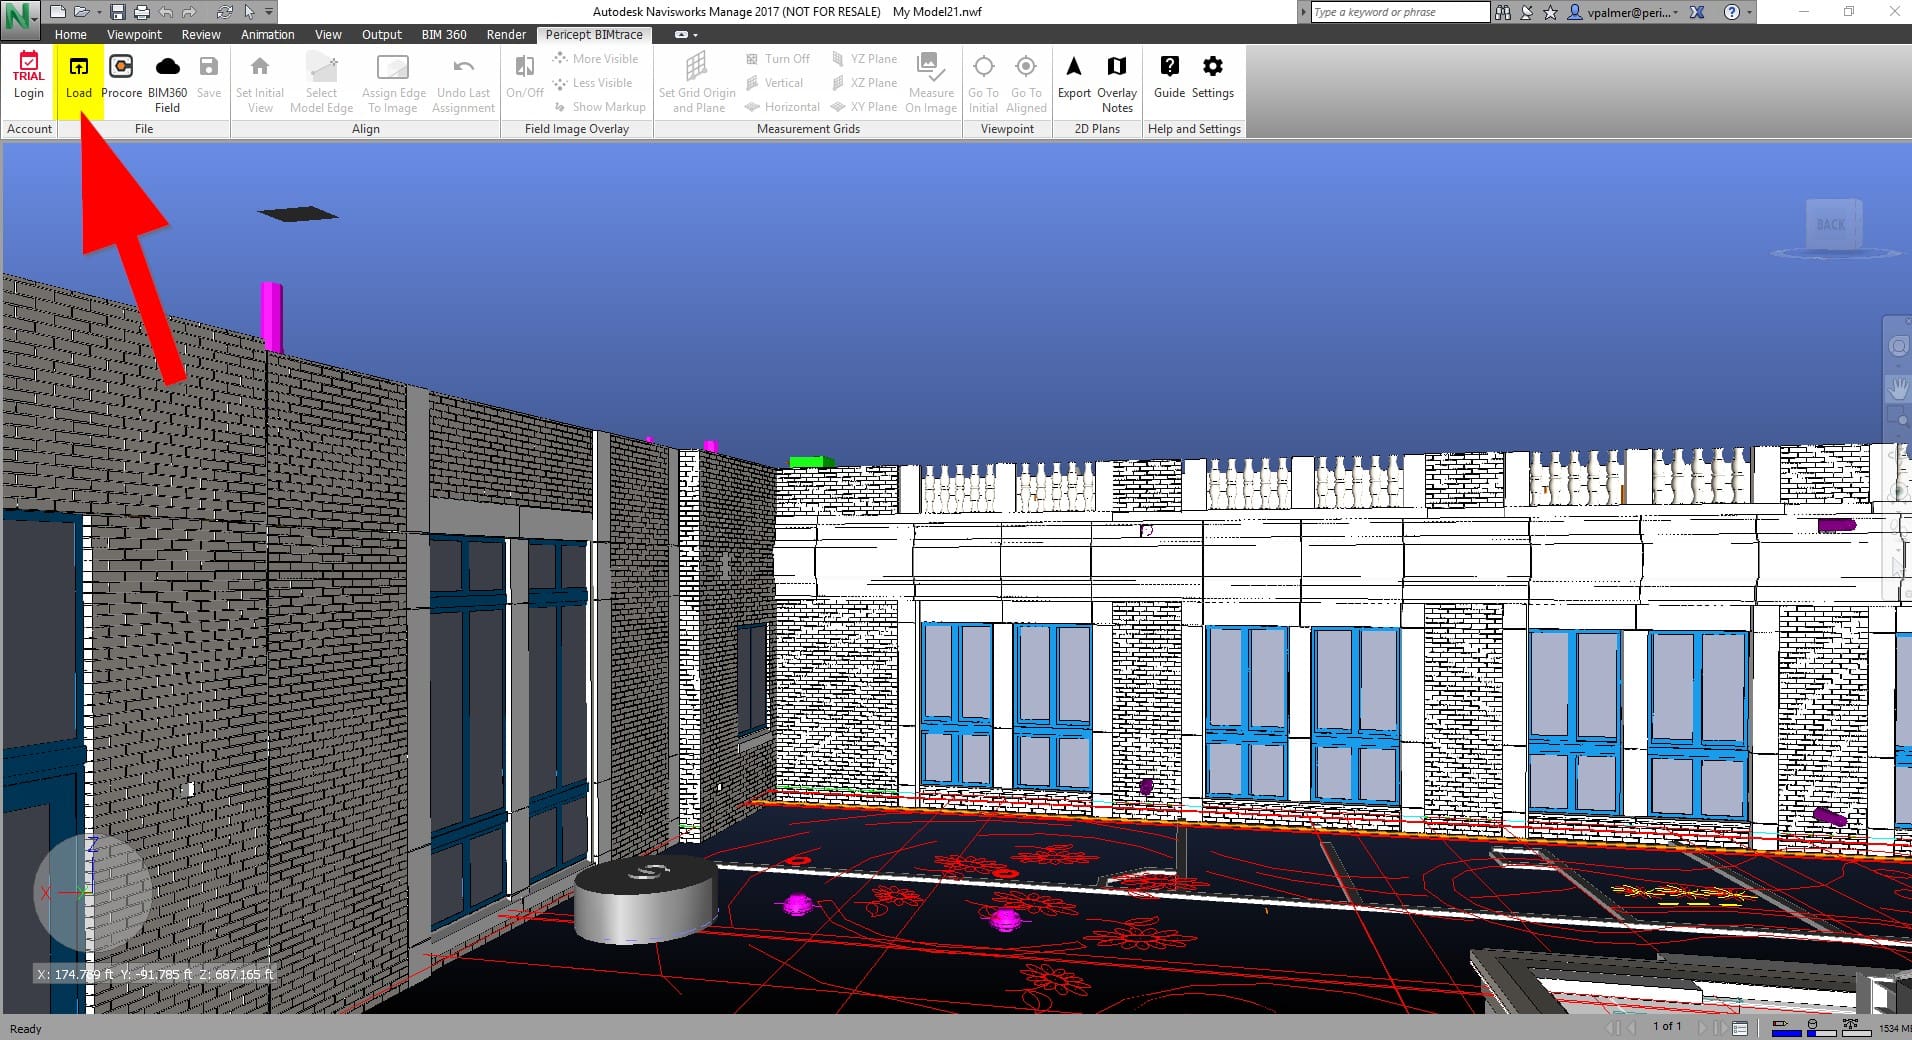
The next step is to import a Verity Photo note into Autodesk® Navisworks® and compare it against a model. First, you need to transfer the photo note JPEG file from your tablet or phone to your computer. Next, open the corresponding model in Navisworks®, and click the Load button from the Verity Photo Toolbar.
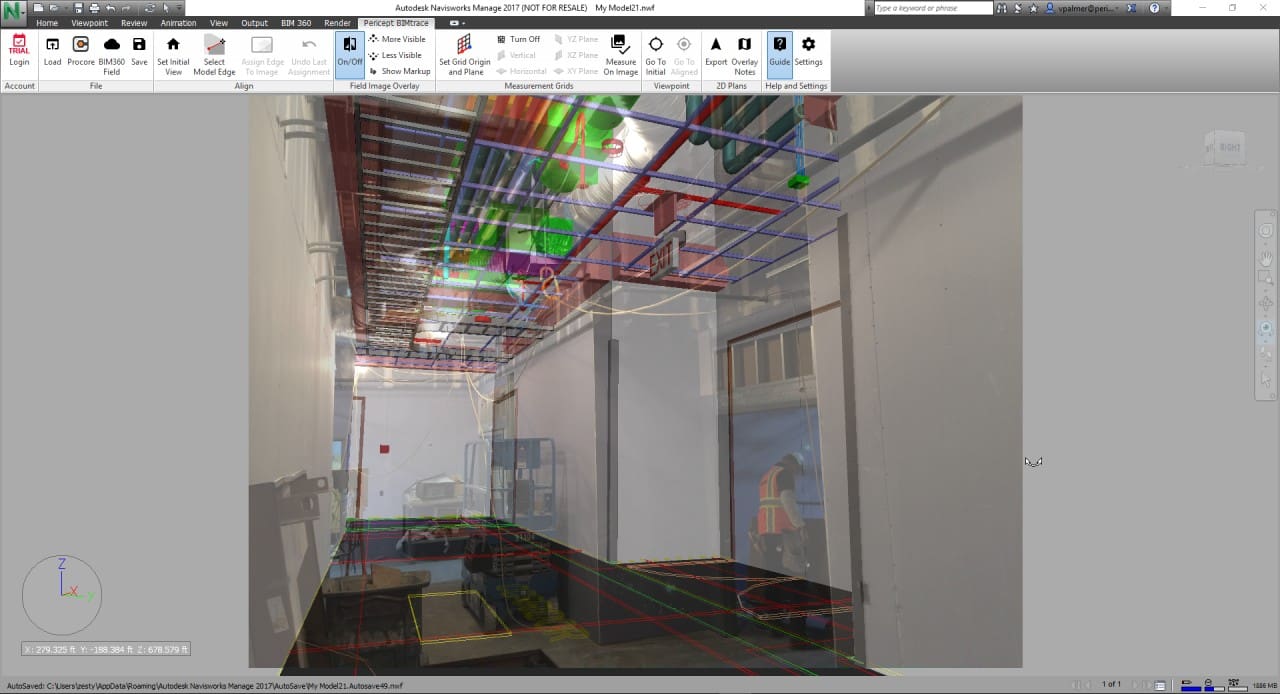
If the note was tagged with a location (we discussed how to tag a note with a location here) you’ll be taken to the corresponding location in the Navisworks® model. Additionally, the camera image from the note will be overlaid on top of the Navisworks® model render:
The next step is to align the Navisworks® camera to exactly match the perspective of the photo note.
Aligning Navisworks® to the note
Set the Home Position
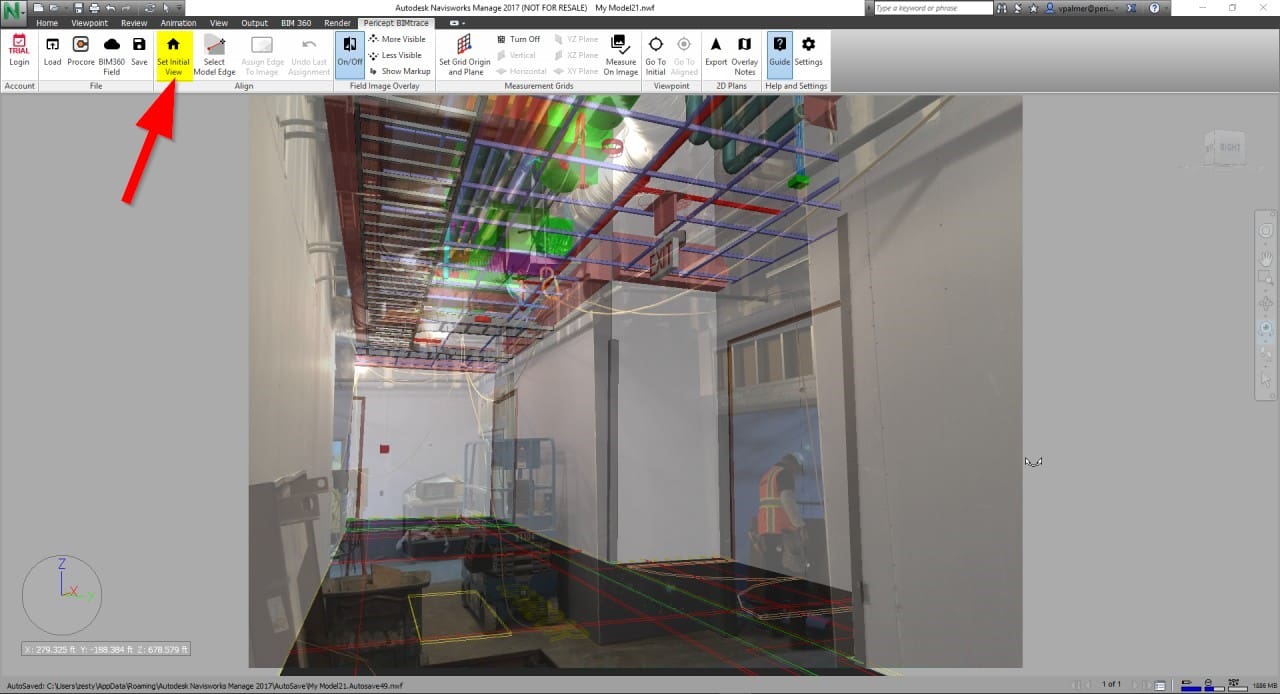
Before performing an alignment, you need to set a “Home” position … this is a base position that Verity Photo adjusts to perform alignment. Move the Navisworks® camera so that the model and the note image are ‘roughly’ aligned … this doesn’t have to be exact, but it’s worth it in the long run to get ‘close’ initially. After you have roughly aligned the Navisworks® camera to the perspective in the note image, assign the home position by choosing Set Initial View from the Verity Photo toolbar.
Perform the Alignment
In order to align the Navisworks camera to match the perspective of the note image, you’ll need to tell Verity Photo what edges in the model correspond to what lines in the note image. You’ll need to specify at least four of these model-image assignments to complete an alignment.
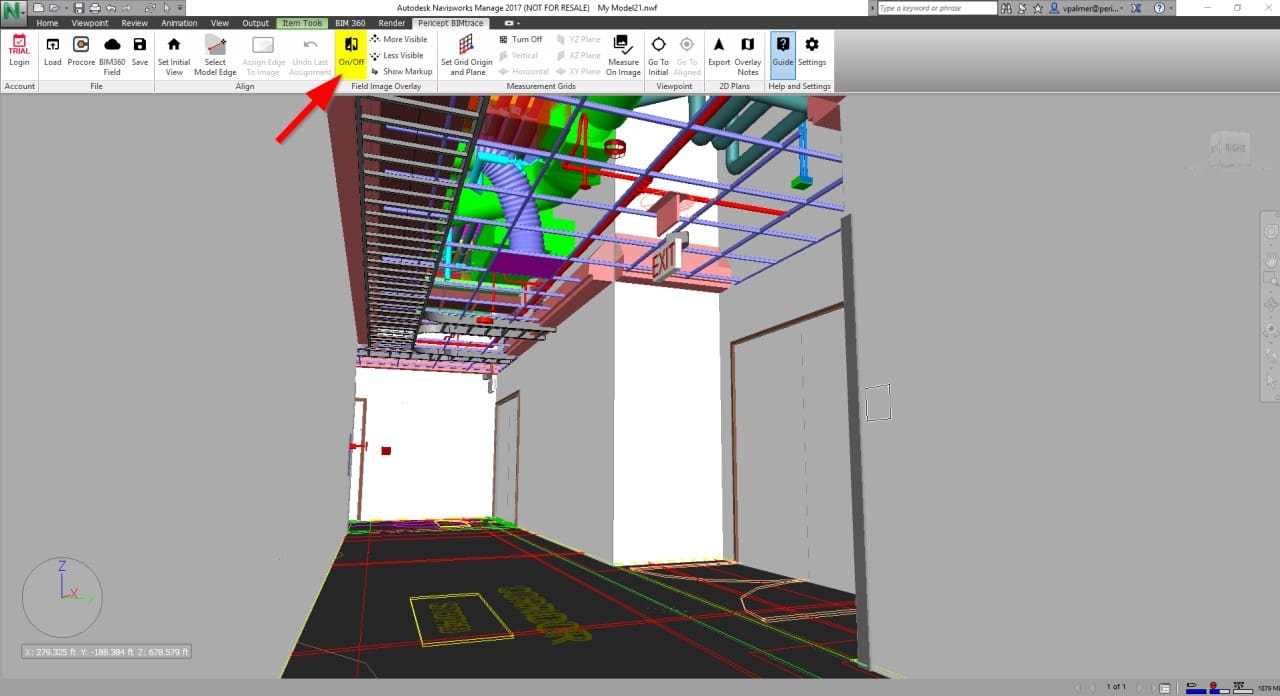
First, select an edge in the model. To make this easier, we generally recommend you turn OFF the note overlay to select the edge (just so you can see the model more clearly):
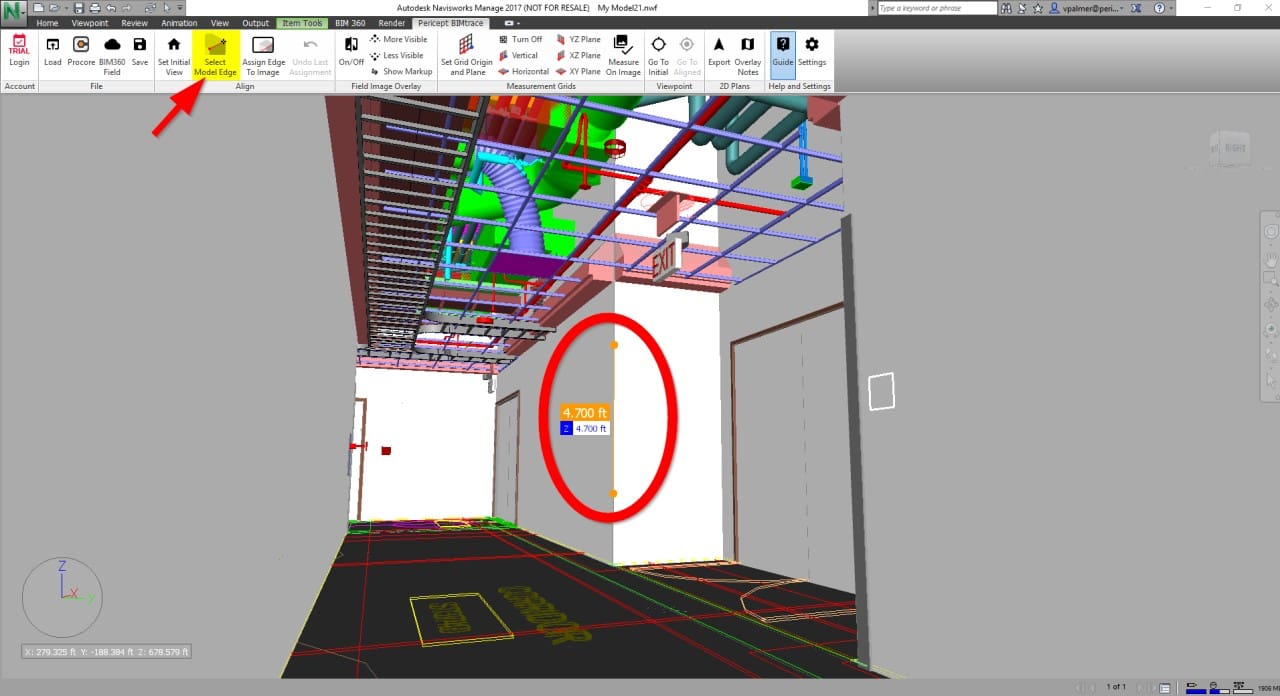
Next, select an edge in the model. Click “Select Model Edge”. The cursor will change in the familiar “Measurement Tool” from Navisworks® … now simply measure along any edge in the model
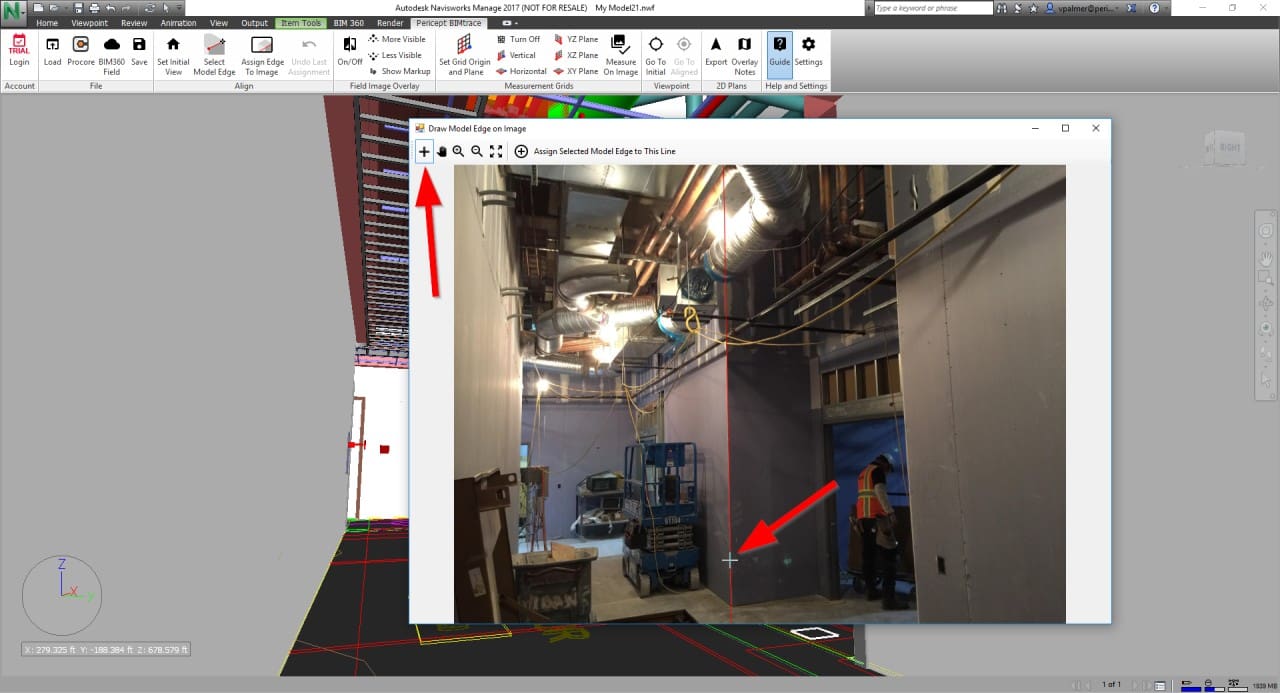
Next click “Assign Edge to Image” from the Verity Photo toolbar and a new window showing the original note image will appear:

Select the Crosshair tool and draw where the edge you selected appears in the image:
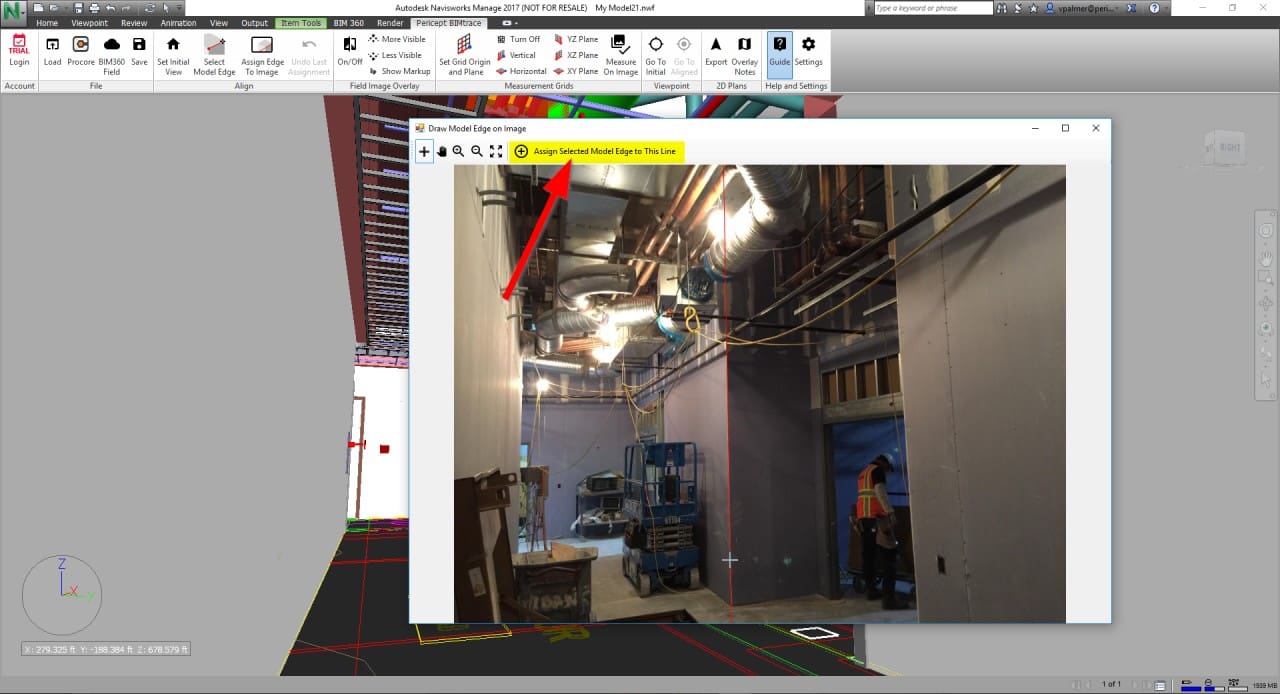
When you’re satisfied with your line, click Assign Selected Model Edge to This Line
The Navisworks® camera will shift perspective. Now turn the Overlay back on.

The Navisworks® camera should now be aligned such that for the model edge we just assigned, the note-image and the model line up exactly (see the red circled area in the above image).
Now we do this same process for three additional constraints. The Navisworks® camera should align closer and closer to the perspective in the note image with each assignment. The more model-edge/image assignments are made, the more accurately this alignment will become. Here we have added four constraints (circled red).
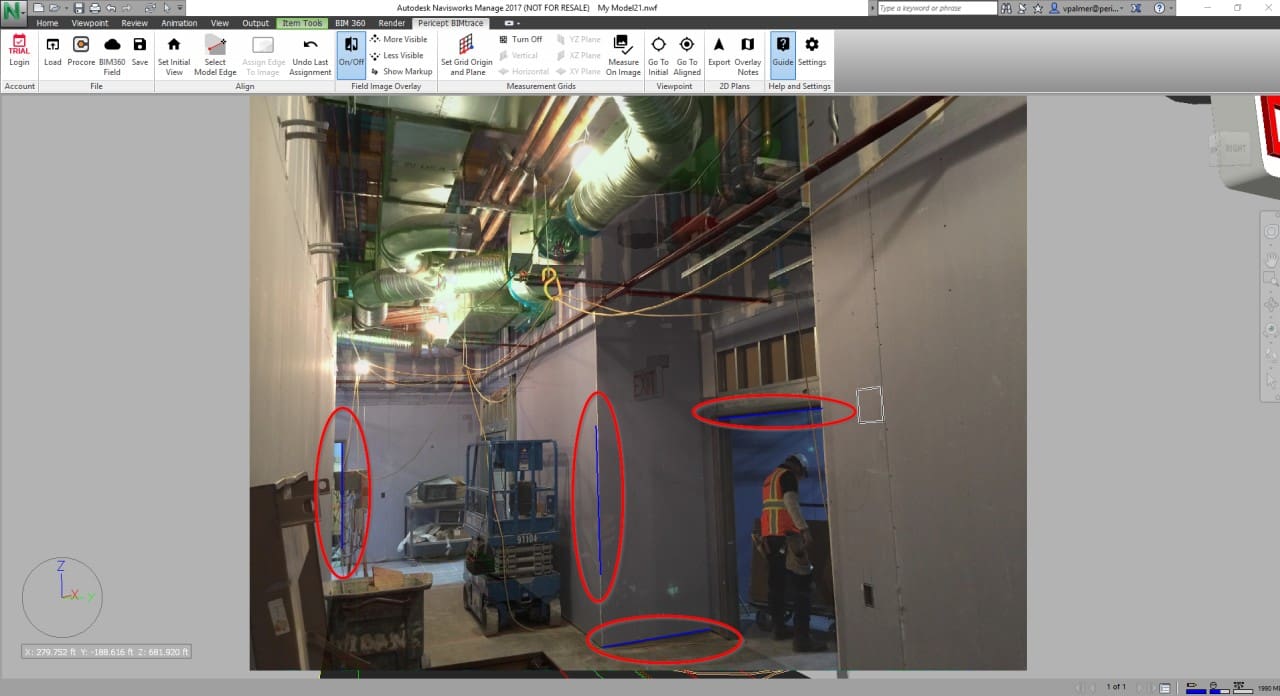
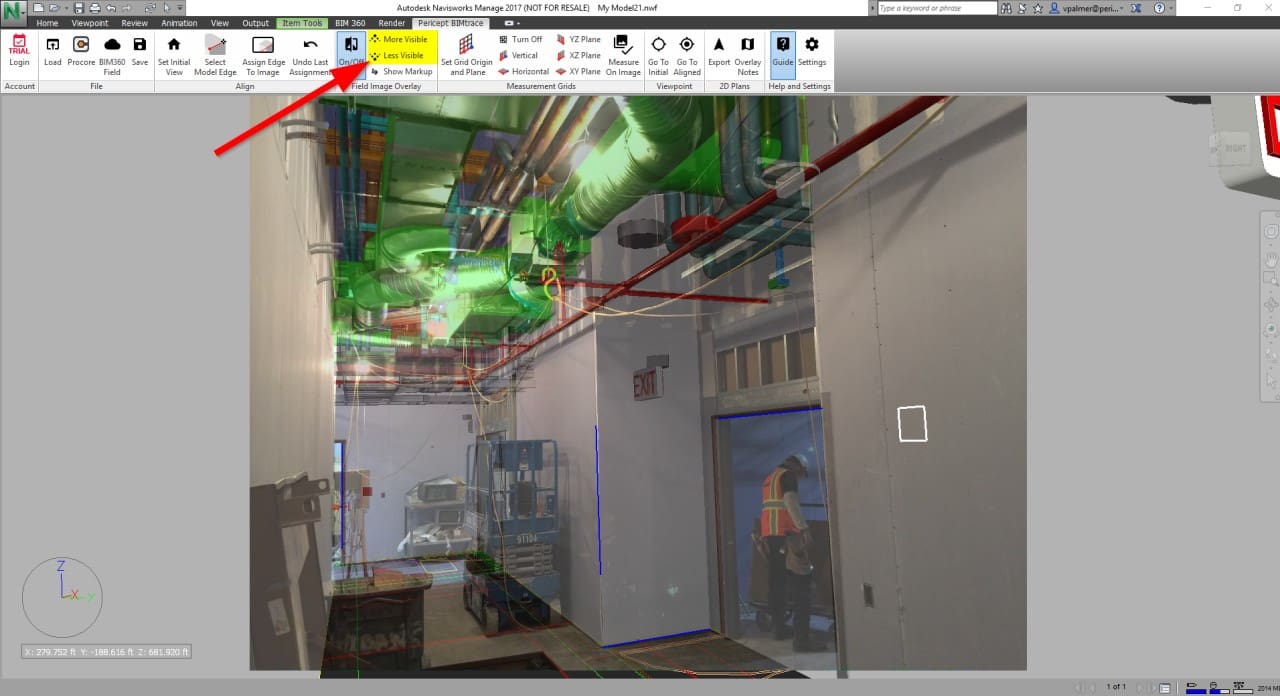
You can adjust the Overlay strength to help compare the image to the model. Because Verity Photo uses calibrated note images, if the model is correct, the image and model should line up exactly:
Save the New Note for Later Presentation
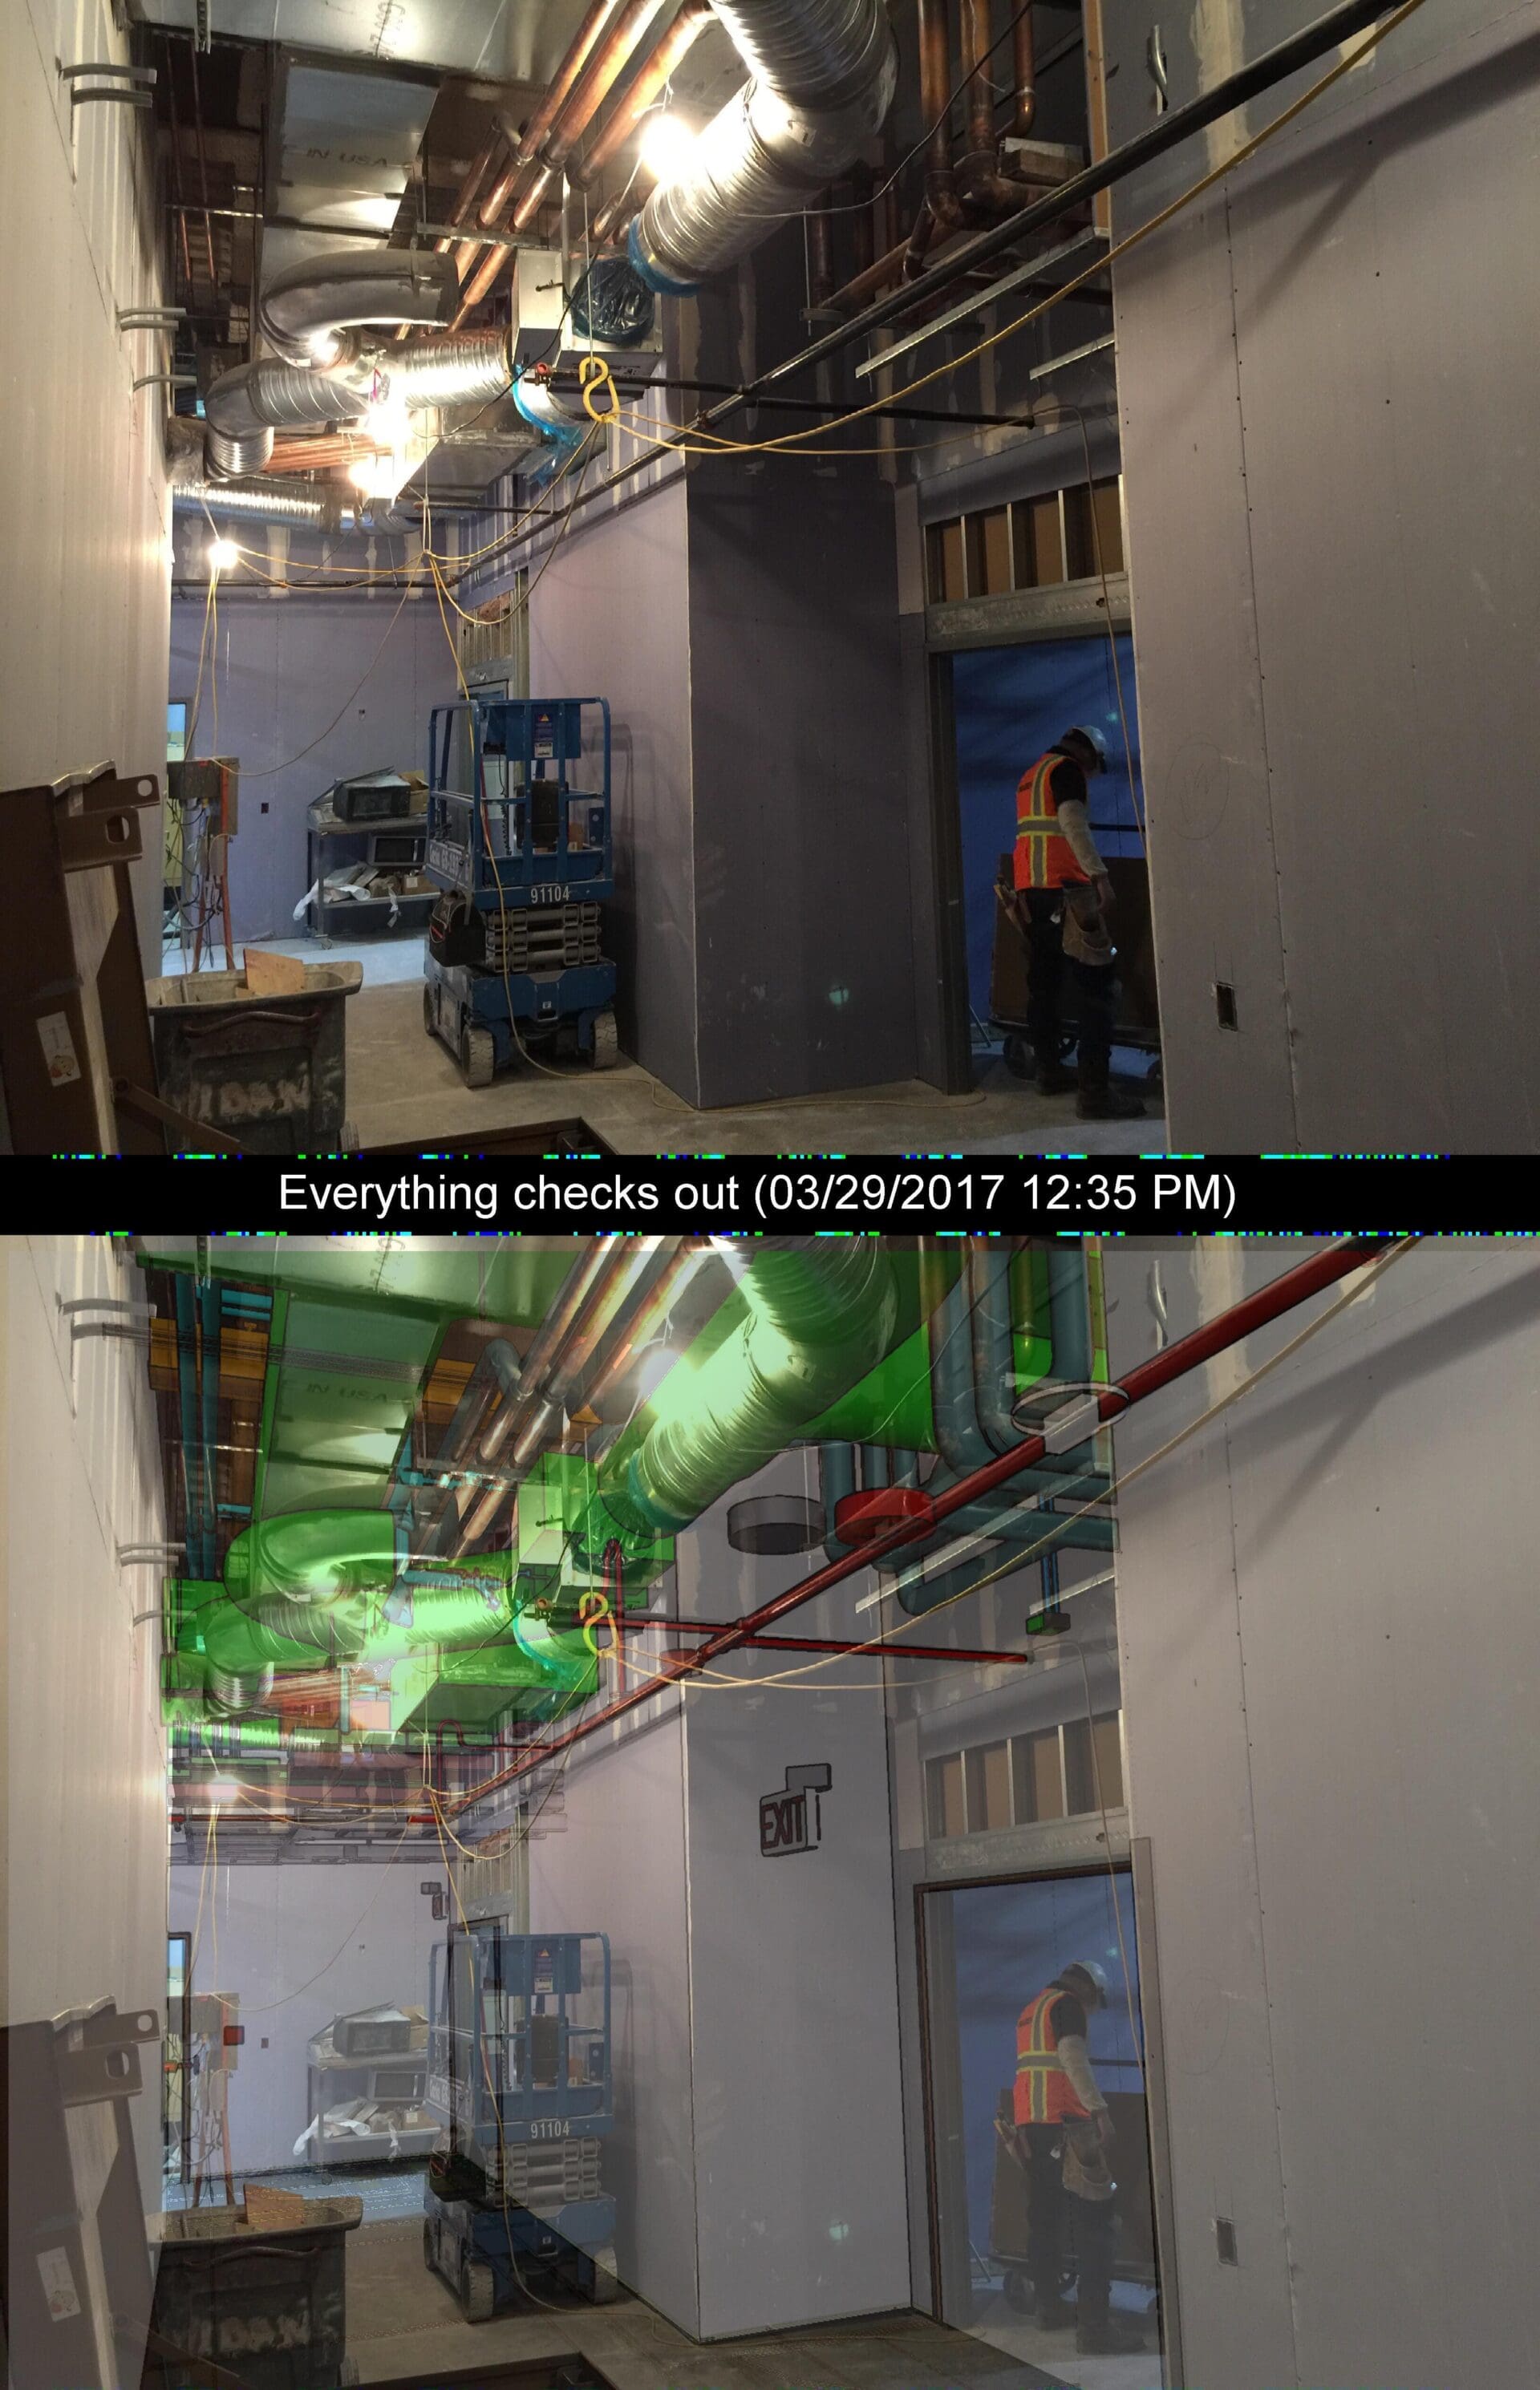
When you have the Overlay adjusted as you want, you can save the model/image composite by clicking Save. You’ll be prompted for a note caption and where to save the new note:

The final note will contain the original camera image and the overlay as it appears in the Navisworks® window: