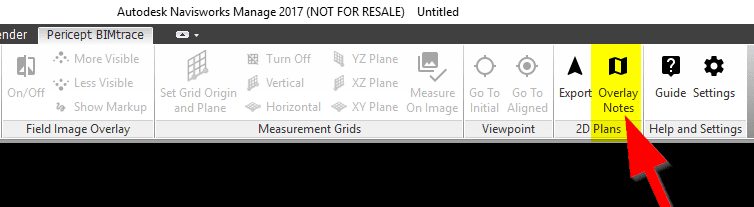
You can use Verity Photo to display captured notes on an exported map. First click the Overlay Notes button on the Verity Photo toolbar:
The “Overlay Notes” window will come up. Next, you need to have a pre-exported map file. We talked about how to export map files here.
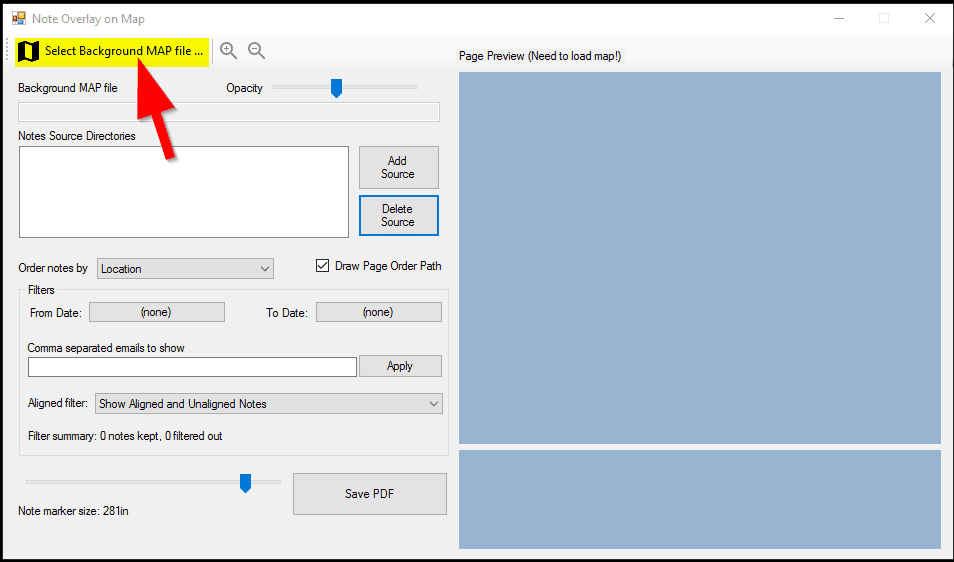
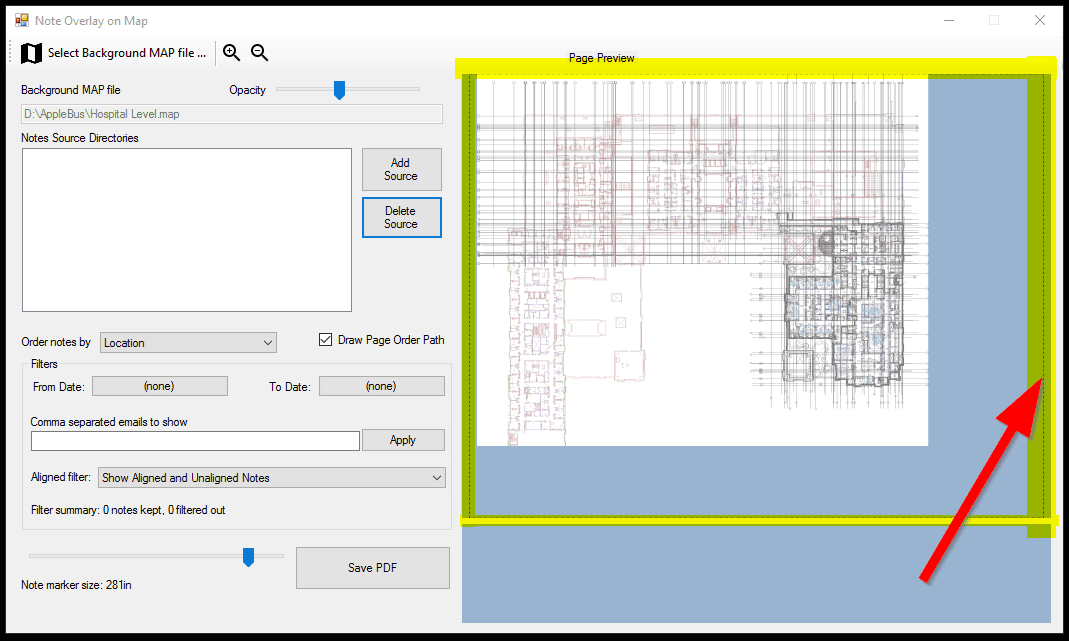
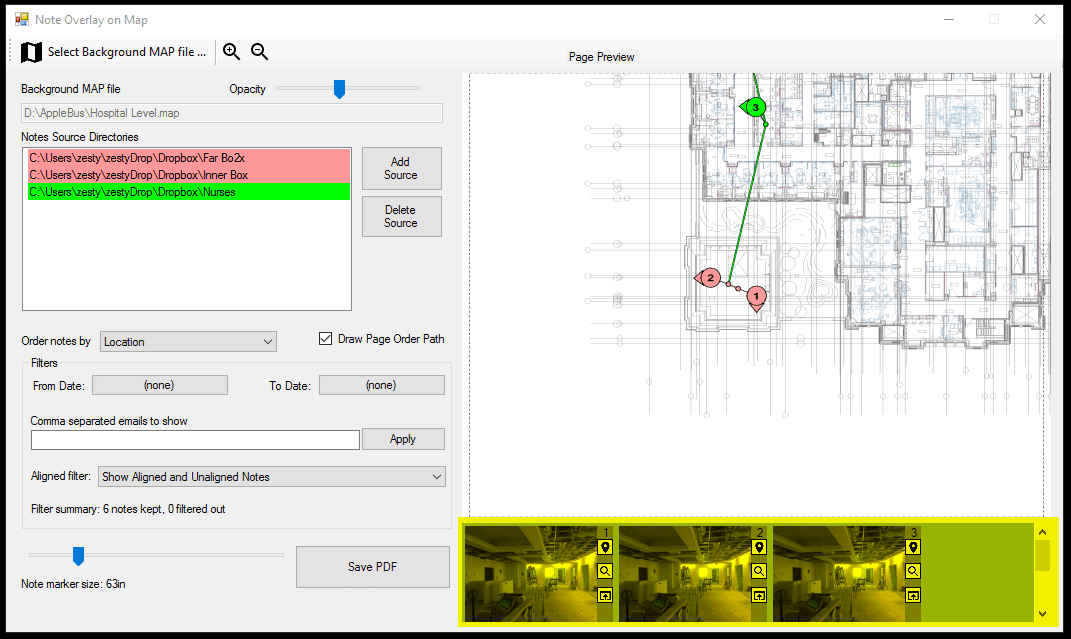
Select a previously exported map file in the File Open dialog window. The map will be displayed in the Page Preview section of the window:
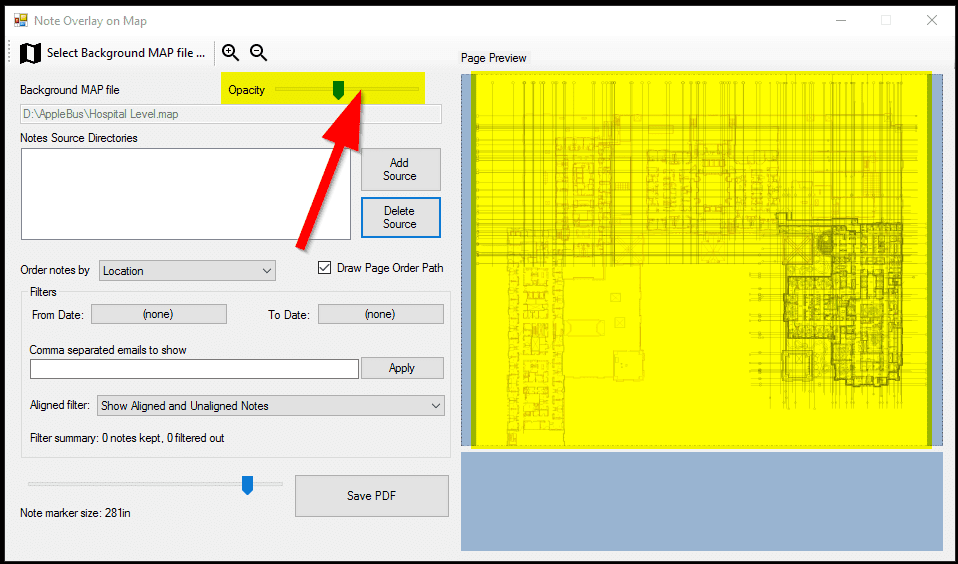
If you later choose to export this note-overlay to a PDF file, the portion of the map displayed in the window will export to the PDF exactly as it appears in the window. To change the opacity (whiteness) of the map, use the Opacity slider on the left (shown above).
You can resize the window at will, but for PDF export purposes, only the center landscape-page-size-ratio area will be exported to the PDF. You can see where the PDF-export region is by looking for the dashed lines in the Page Preview area:
You can zoom in and out of this map view by using the top zoomin/zoomout toolbar buttons, or by using the mouse scroll wheel. Click-hold-and-mouse-move to pan the map view (same interface as Windows Image Viewer).
Next you need to overlay notes on the map. Select the “Add Sources” button and choose a directory containing notes. You can select multiple directories to add at a time.

Each directory you select now serves as a “Note Source”. Any Verity Photo notes discovered in that directory will be plotted on the map at the location they were tagged in the field. Each note source direction can have it’s own color, and this provides a mechanism for plotting multiple series of notes on the same map.
The directories we selected are now displayed under Note Sources, and have been assigned a default light-red color:
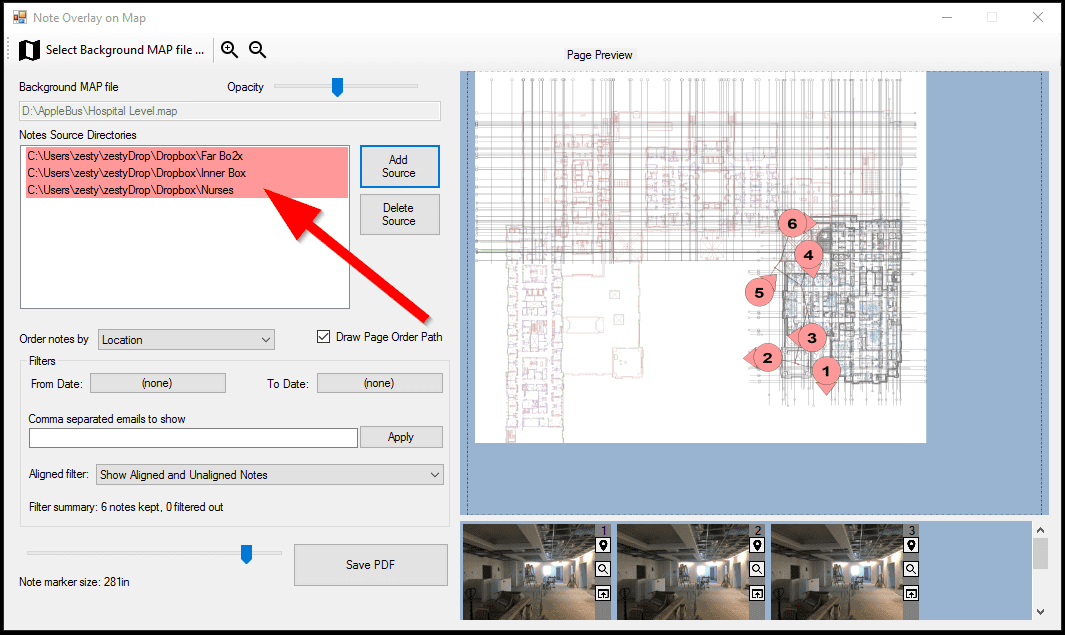
The individual notes are numbered and displayed at the appropriate location and orientation on the map. The arrow next to each note marker circle points in the direction tagged in the field on the Verity Photo app when the note was taken.
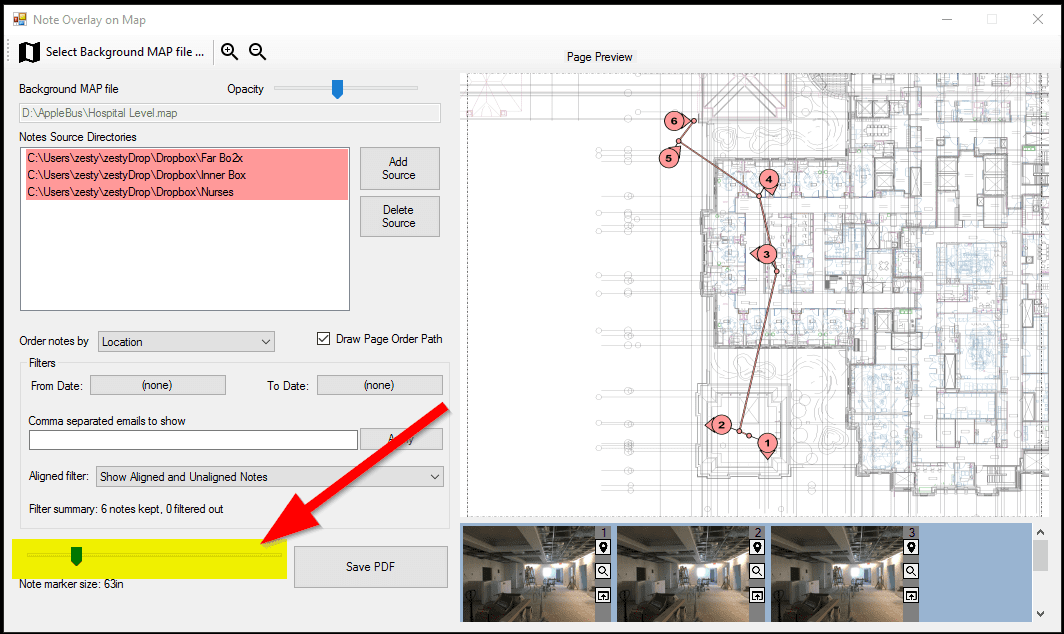
To adjust the size of the note markers, use the Note Marker Size slider at the bottom of the window:
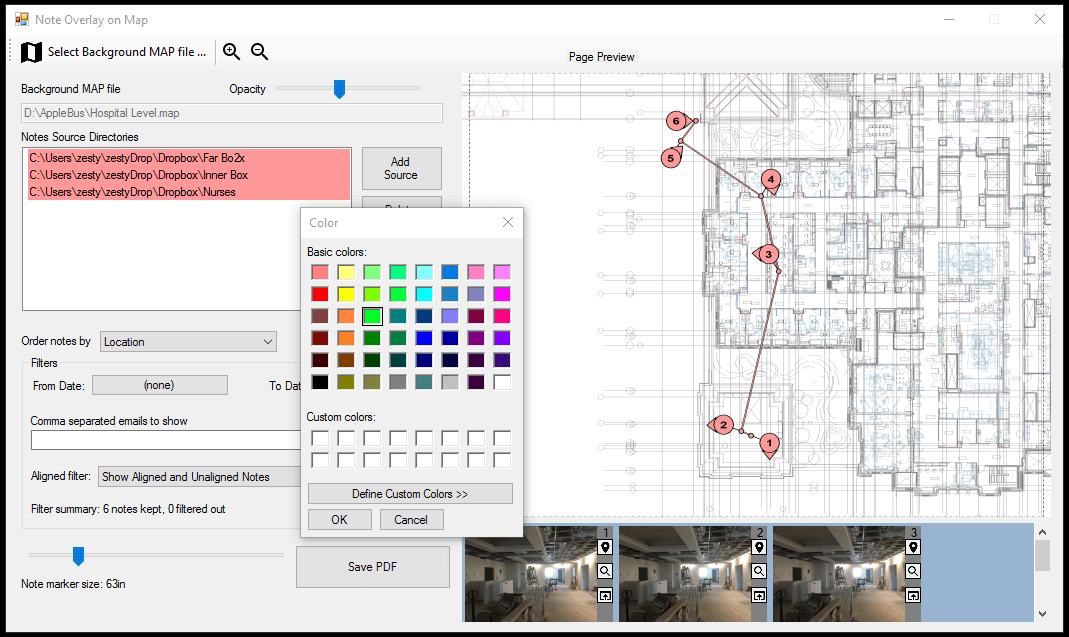
You can adjust the color of each note source by double-clicking on the directory name under Note Sources:

Thumbnails of the displayed notes are shown in the bottom right of the window. Clicking on any thumbnail will automatically center the view on the respective note marker on the map, and clicking on any note marker on the map will scroll the the thumbnail list until the corresponding thumbnail is visible.
Additionally, clicking twice on a note marker will take you to the next note marker in the sequence.
The thumbnail view also provides a series of shortcut buttons for note manipulation in Autodesk® Navisworks®:
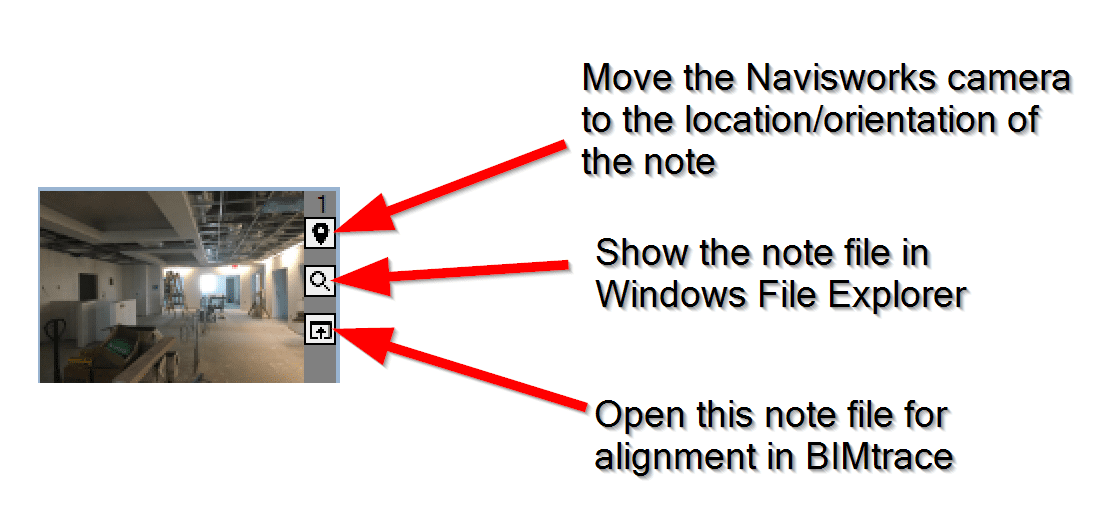
Effectively, the option to move the Navisworks® camera to the location tagged in the note allows notes to function like JEPG-based saved views in Navisworks®.
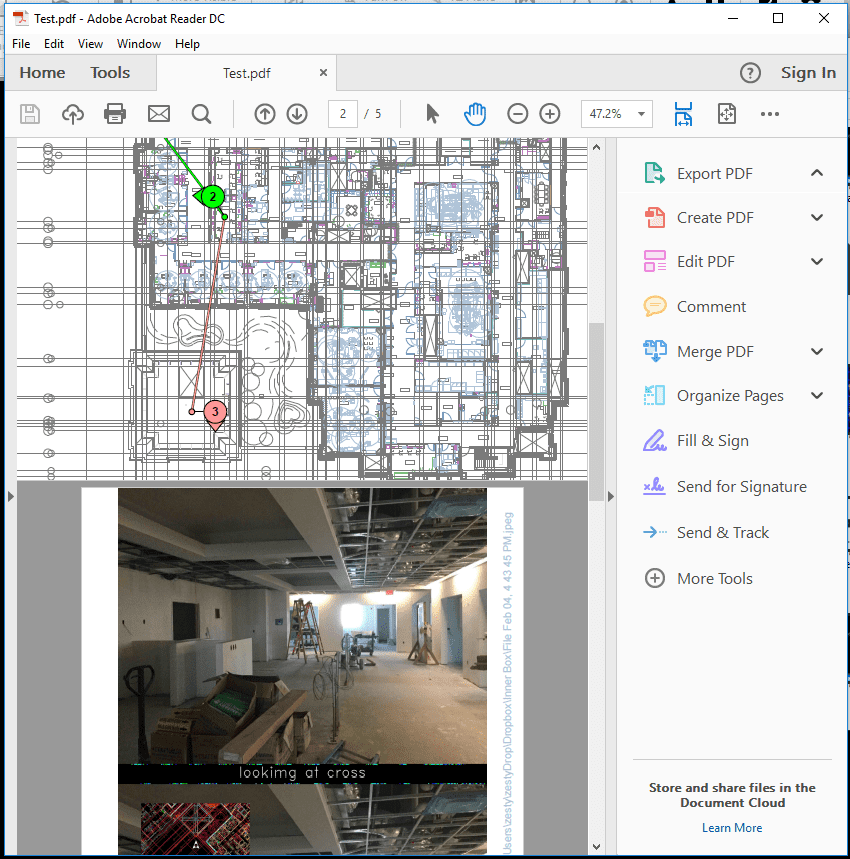
You have the ability to export this map overlay view to a PDF for easy distribution. In the resulting PDF, the map is rendered on the first pages, followed by each subsequent page being a full-page image of each note. The order these notes appear in the PDF is the same as their numeric order displayed in this window.
You can change the way notes are ordered for export by choosing different options in the “Order notes by” dropdown. Also, you can choose whether or not to draw a path (line) between consecutively numbered notes by selecting the “Draw Page Order Path” checkbox.

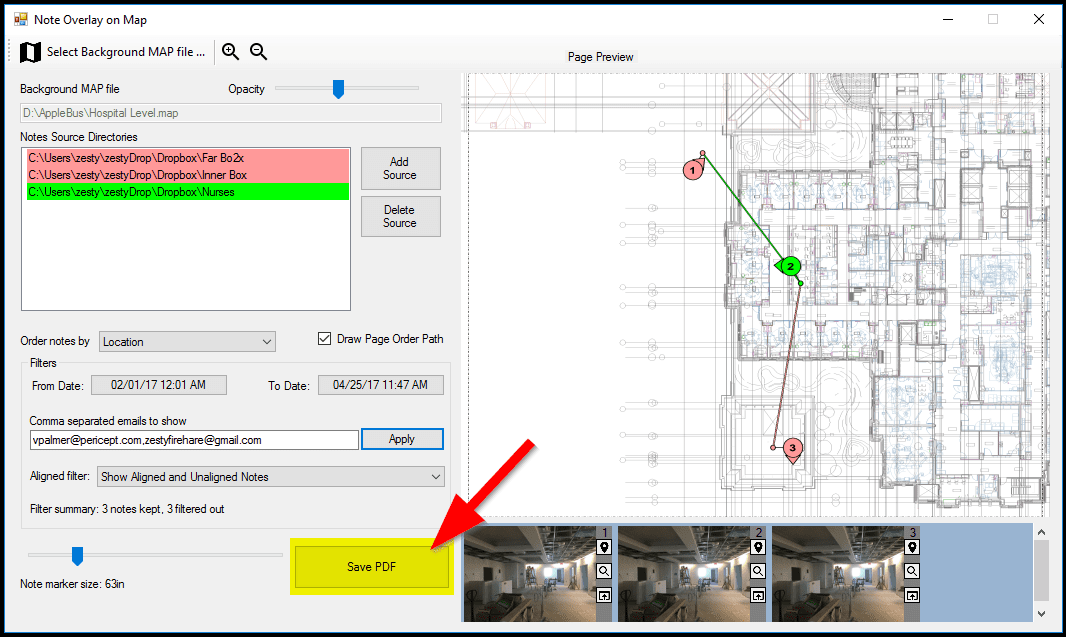
This window also allows for filtering of the notes that are displayed. To only display notes which were generated within a certain timespan, use the “From Date” and “To Date” buttons to select a start and end date range. Any notes discovered in note source directories in this date range will be displayed … any discovered notes which are outside of this date range will simply not be plotted.

Additionally, you can choose to only display notes taken by certain users. To filter by note-taker email, simply enter a comma-delimited list of emails you wish to display:

To stop filtering by email, simply clear the text box and click Apply again.
You can also filter to only include notes that have not been aligned (those generated directly by the Verity Photo iOS app) or those that have been aligned by opening and then aligning and then saving them again through the Verity Photo Navisworks® plugin.
To filter by whether or not a note has been aligned, simply choose an option from the “Aligned filter” dropdown:

Finally, if you want to export this overlay to a PDF for easy distribution, simply click the Save PDF button at the bottom of the window.
After the export is complete, the plugin will ask you if you want to locate the file in Windows File Explorer:

The resulting PDF has the following format:
1st page: Table of Contents listing the individual note sources and their colors
2nd page: A rendering of the map with note overlays. Each note marker is hyperlinked to its corresponding note image on the subsequent pages.
Rest of the pages: Each page is a single note image that was plotted on the map.