Search Knowledge Base by Keyword
Getting Started
This article will go over how to use the Volume tool. The Volume tool calculates the amount of material that is needed to add or remove from a surface to match a specific reference elevation.
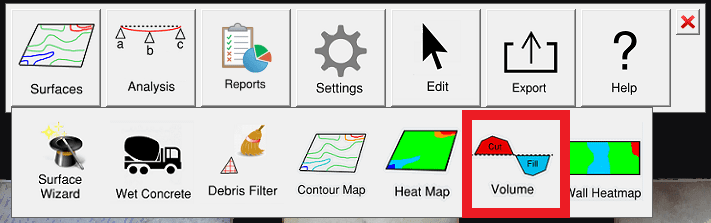
This tool is located in the Builder Toolbar, under Surfaces:
Using the Volume Tool
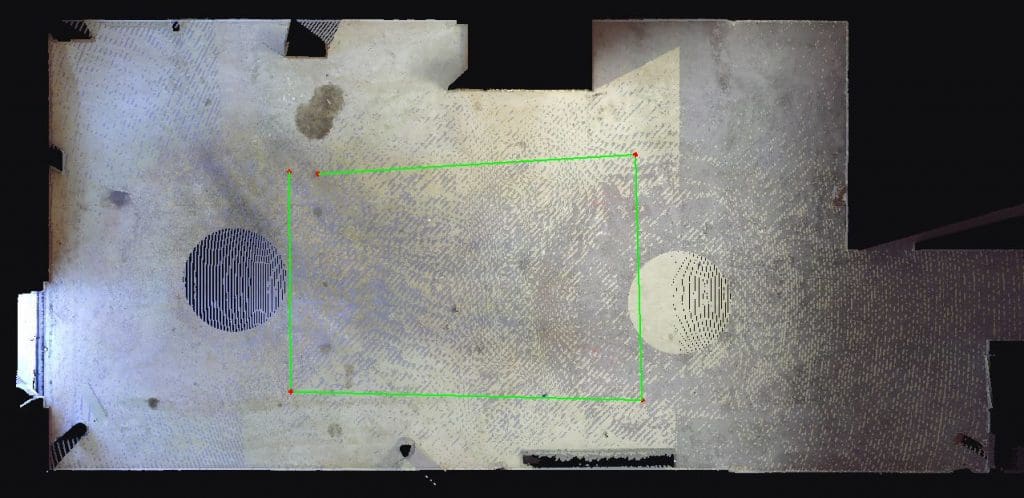
With the tool activated, define an area for analysis by left clicking points around your project.
Volume Tool Settings
With a defined area, the Volume Settings dialog will appear.
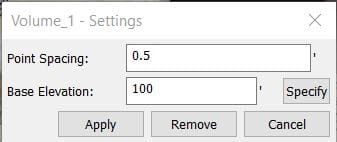
- Point Spacing – Reduces the density of the point cloud to a grid spacing which utilizes less points during the analysis. This feature is computationally expensive, so a sparse point spacing of 6” (15cm) or greater is recommended.
- Base Elevation – Specifies the target elevation of the design surface for volume calculation.
- Specify – Click on any scan point to use its elevation as the Base Elevation for this volume calculation.
- Apply – This button confirms the settings and calculates cut and fill volumes.
- Remove – This button removes the active Volume from the current analysis.
- Cancel – This button cancels the command and dismisses the dialog.
After choosing your settings, click apply to start the analysis.
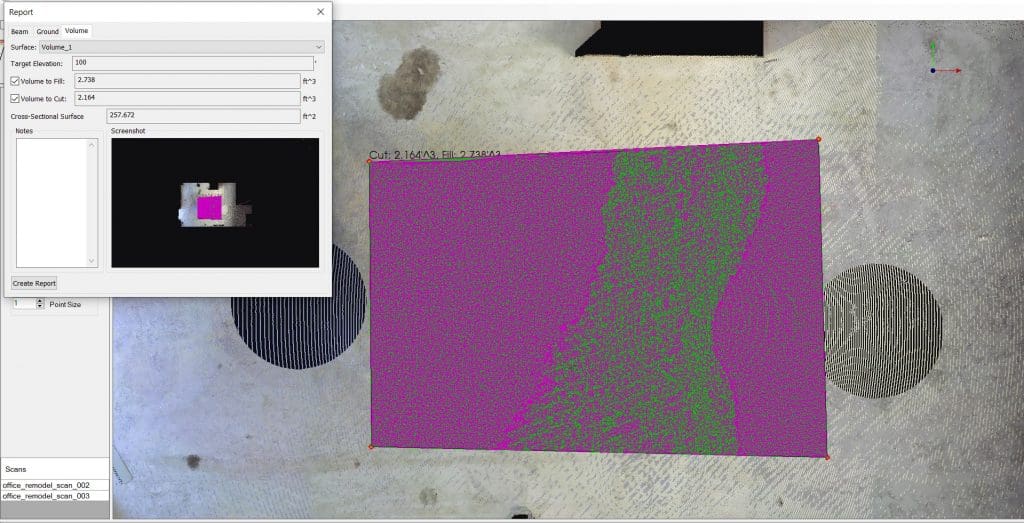
After the analysis is complete, you will have a visual representation of cut and fill alongside of a Report dialog.
Volume Tool Report
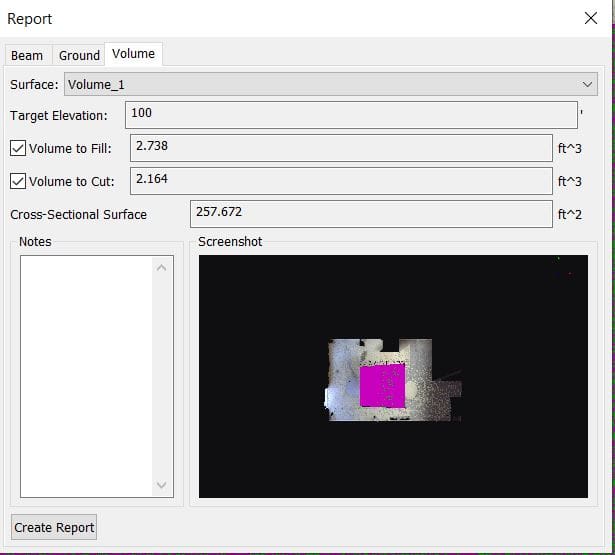
- Surface – Selects the command session used to create the cut and fill volumes to report.
- Target Elevation – The target elevation used to create the analysis.
- Volume to Fill – The volume of material that you must add to the low areas of the analysis to raise it to the target elevation.
- Volume to Cut – The volume of material that you must cut in order to lower areas of the analysis to the target elevation.
- Cross-Sectional Surface Area – Reports the area of the analyzed region.
- Notes – Additional information to appear in the volume report.
- Screenshot – A screenshot of the analyzed region.
- Create Report – Opens the Create Report dialog box to specify the file type and location of the exported report.
Working with Void Spaces
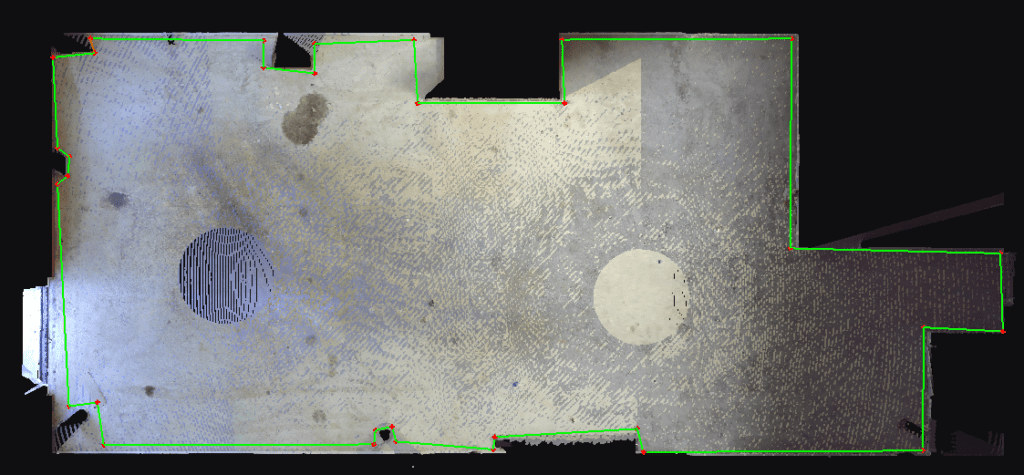
Due to the way the Volume Tool calculates the volume, to get accurate results out of the tool, it is important to keep your analyses fully within point information. If a triangle could be drawn between the boundary lines of your defined area established in the Volume Tool, the tool will use these lines to calculate further triangles, adding area to your analysis that can make the results inaccurate.
As an example case, defining the area in the example below, will lead to inaccurate results:
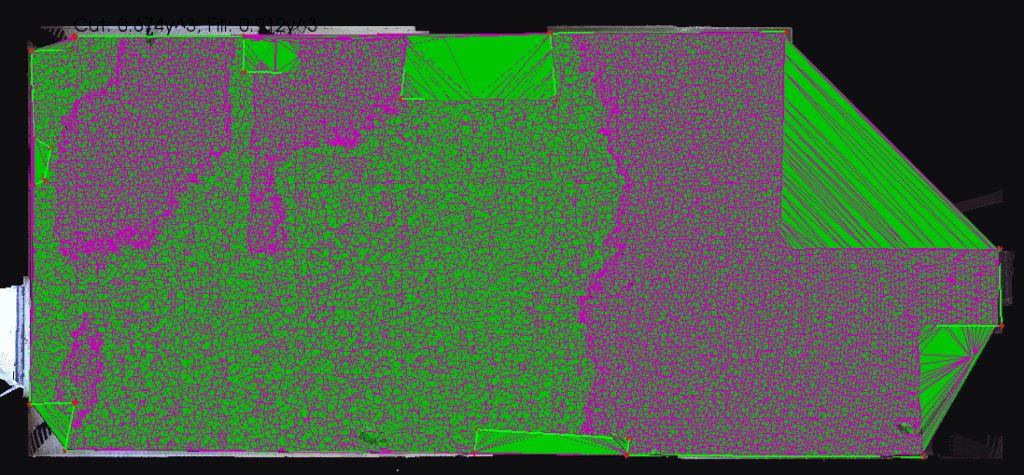
Defining the area in this way will result in triangles being drawn through void areas as seen in the picture below.
As such, the recommended workflow is to work in sections to avoid any triangles being drawn through void space. An example of this workflow is pictured below.
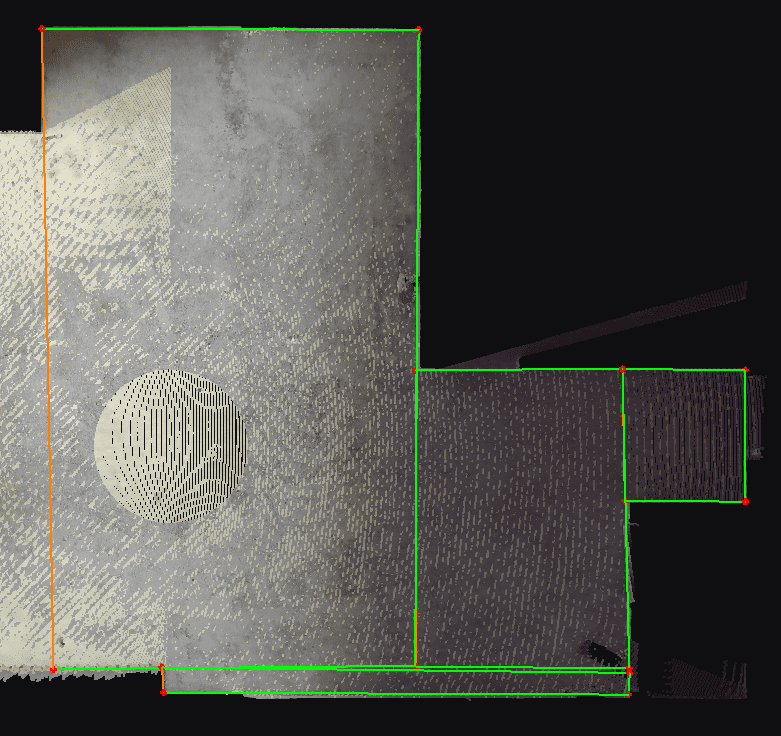
Careful placement of your lines when defining these areas will also help ensure that your results are as accurate as possible.