Search Knowledge Base by Keyword
Getting Started
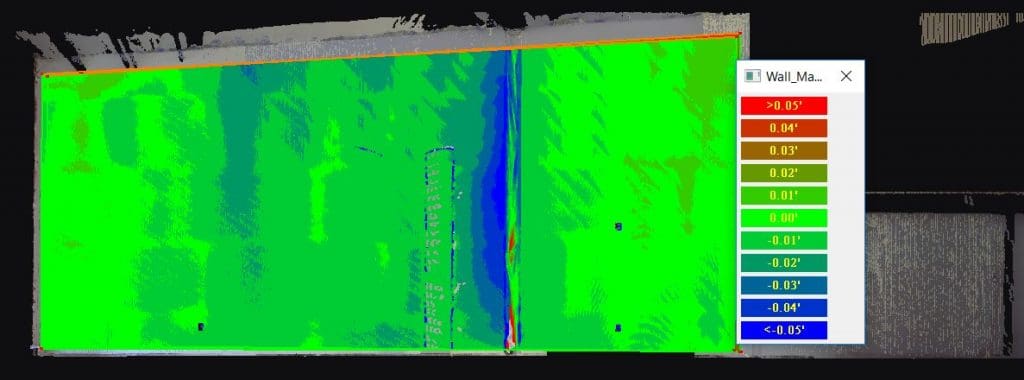
This article will cover how to create a Wall Heatmap. The Wall Heatmap will generate a heat map of a sectioned wall, similar to how normal heat maps work for slabs. If you are looking for heat map information for slabs, refer to this article.
Workflow
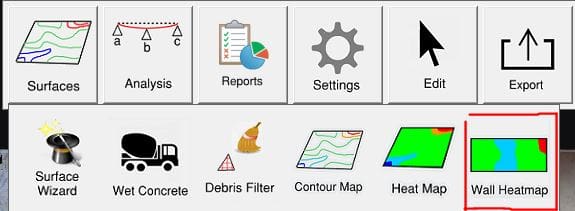
You can find the Wall Heatmap tool in the Builder Toolbar under Surfaces.
Select this tool and define an area around your wall using left clicks to draw a polygon. You do not need to connect your final line as Rithm will automatically connect it upon pressing Enter. Upon completing your defined area, the Wall Heatmap Settings dialog will appear.
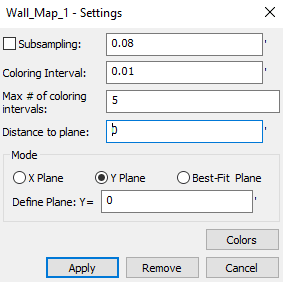
- Subsampling – Reduces the density of the point cloud, causing fewer points to be calculated in the generation of the Wall Heat Map. Think of this as a decimation grid.
- Coloring Interval – The distance interval between the colored bands.
- Max # of coloring intervals – Determines the number of color intervals used to color the point cloud.
- Distance to plane – Determines the distance from the plane at/beyond which points are assigned High or Low color.
- Mode – Allows you to select a plane for Rithm to measure distances from. Note that X and Y plane are meant for point clouds that are tied to control.
- X Plane – Sets a vertical analysis plane to the X-axis based off of a set control system.
- Y Plane – Sets a vertical analysis plane to the Y-axis based off of a set control system.
- Best-Fit Plane – Sets the analysis plane to the best fit plane based on the defined area.
- Define Plane (X or Y) – Sets the point along the X or Y axis for the analysis plane. Note this is for adjusting the plane if the analysis needs to be flush with the coordinate system.
- Colors – Opens a dialog to specify custom colors for the High/Low areas.
After finishing your settings, click Apply in the Settings dialog. Rithm will ask if you are happy with your results or if you would like to redo. If yes, click confirm. If not, click redo to change your settings.
Export
Use the export feature in the builder tab to export the map as a .XYZ file. With the .XYZ file, you can open it in Recap and save it as an RCP file. Next, append it into your Navisworks project.