Easy Connect
Getting Started
This guide will walk you through the Easy Connect portion of the piping workflow. To begin this workflow, ensure you have a point database model, and piping model for your project already created, QA’ed, and opened.
Select Easy Connect
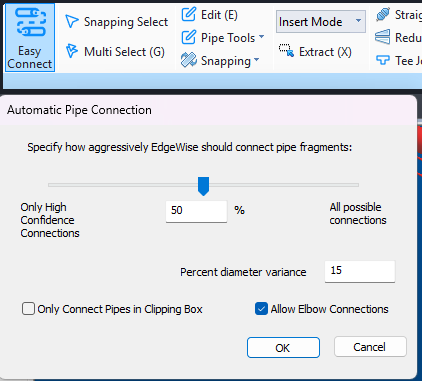
Fig 1: Easy Connect Dialog
Only High Confidence Connections: EdgeWise will only connect cylinders that it is positive are connected
All Possible Connections: Any connection that is possible within EdgeWise
How it works:
- EdgeWise looks at the center lines, and the diameter
- Will never make T-connections, reducers or “impossible” connections like U-turns
Check Boxes
- Only Connect Pipes in Clipping Box - If a clipping box is applied, you may choose to only run the Easy Connect tool for the active clipped area
- Allow Elbow Connections - This will allow EdgeWise to place elbows in the model for pipes that are perpendicular to each other
- Automatically Fit Elbows - Elbows placed by Easy Connect can be closely fitted to the active Point Cloud Database. Instead of the standard 1.5 bend radius, this will automatically round elbows to a bend radius of 0.5, 0.75, 1.0, 1.5, and 2.0.
After Easy Connect, the model will look like:
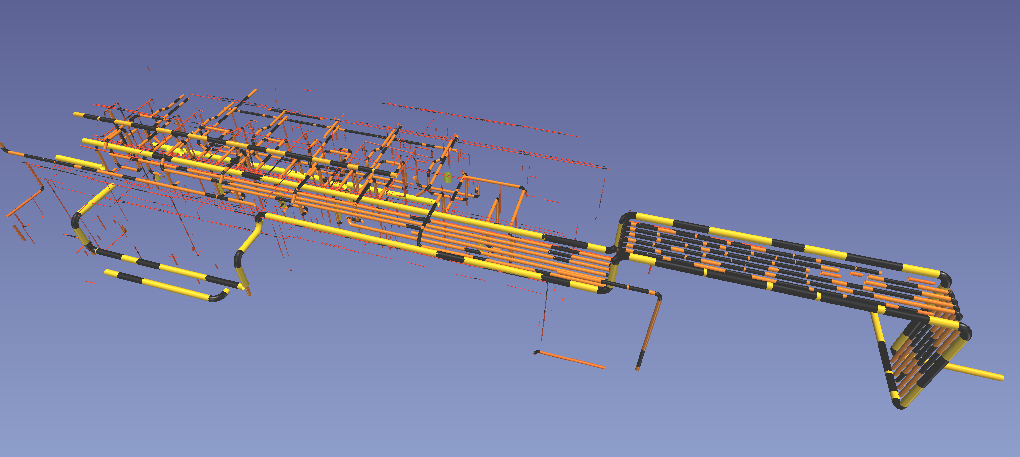
Fig 2: Easy Connected Model
The straight black cylinders are “Connections”. Open the Part Info Smart Sheet, and select a black connection in the 3D view. If connection is listed under the Type column, then the cylinders will NOT export to any deliverable software.
Now that this step is complete, continue to the Semi-Automatic Extraction and Connection article.