Search Knowledge Base by Keyword
Getting Started
The building module inside of EdgeWise offers a fully automated algorithm that performs automatic wall extraction. This article will cover the steps necessary to perform additional semi-automated extraction and modification. Additionally, this guide will cover modification of walls and levels.
Most building workflows will start with the use of Process Scans for Automatic Wall Extraction. However, some semi-automated extraction and modification may still be necessary. Begin by selecting your wall model in the model selection pane and select the Building tab in the ribbon. This will reveal all the tools that are available for the building module in EdgeWise.
The Semi-Automated Extraction tool is designed to supplement the full automation from process scans. However, there are some cases where you may only need to extract a small portion of the entire point cloud. There are other cases where QA would take longer than starting from scratch. In these cases, you may start with Semi-Automated Extraction instead of starting with full automation. First, you only need to process the point database. Then, in the File tab, click on Blank Model > New Building Model. From here, you will need to declare at least two levels to begin your workflow. Reference the rest of this article for further workflow guidance.
Modify Levels
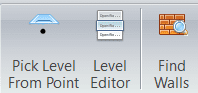
Pick Level from Point allows you to declare a new level at a point from the Point Database.
Opening the Level Editor will show all existing levels in your project, along with their name and Z value. It is important to always adjust levels first before continuing with editing of your wall model, else you risk starting over. Here, you can change the level names or Z values by typing in new values or names. Note, if you change the Z values of levels that interact with wall models, those walls will be deleted. To fix this, click the Find Walls tool and EdgeWise will quickly revert your walls to their original state. Note, “original state” means how the walls were extracted right after process scans.
Modify Walls
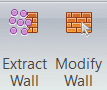
Select the Extract Wall tool or press the X key on your keyboard to begin semi-automated extraction. Left-click to start the creation of the extraction box, then continue to click around the points associated with your wall. Double-click when you are finished to complete the selection. EdgeWise will then extract your wall.
Click the Modify Wall tool, or press the E key on your keyboard and left-click a wall to begin modifying. Use the slider arrows to modify the walls length, or thickness. Right-click the selected wall and click Edit Levels to modify a wall’s ceiling and floor level. Right-click the selected wall and click Flip Normal to flip the normals on the wall.
Now, proceed to the Exports step in the workflow.