Search Knowledge Base by Keyword
-
Licensing
-
General
-
Process Scans
-
Piping
-
Structure
-
Ducting
-
Cable Trays
-
- Articles coming soon
-
- Articles coming soon
-
Building
-
Exports
-
Point Clouds
2 out of 5 stars
1 rating
| 5 Stars | 0% | |
| 4 Stars | 0% | |
| 3 Stars | 0% | |
| 2 Stars | 100% | |
| 1 Stars | 0% |
Getting Started
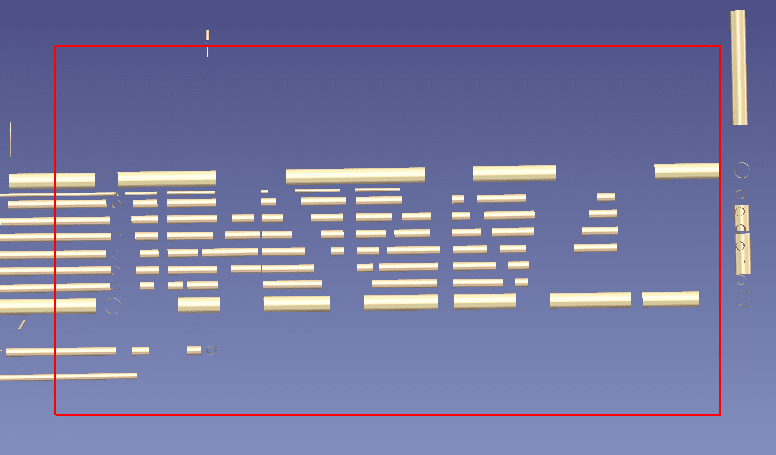
This article will cover the Clip Tool available within EdgeWise. Similar to other clipping tools, the Clip Tool allows you to crop out a specific 3D area of your project.
Clip Tool
To use the clip tool, navigate to the View tab and click Clip. EdgeWise will zoom you in and knock you into orthographic view. From here, left-click and drag to create a red selection box. Let go, and your model will be clipped.
You can also clip in a non-orthogonal square. Select Clip, left-click once, left-click again, and then drag. Once you let go, your model will be clipped.
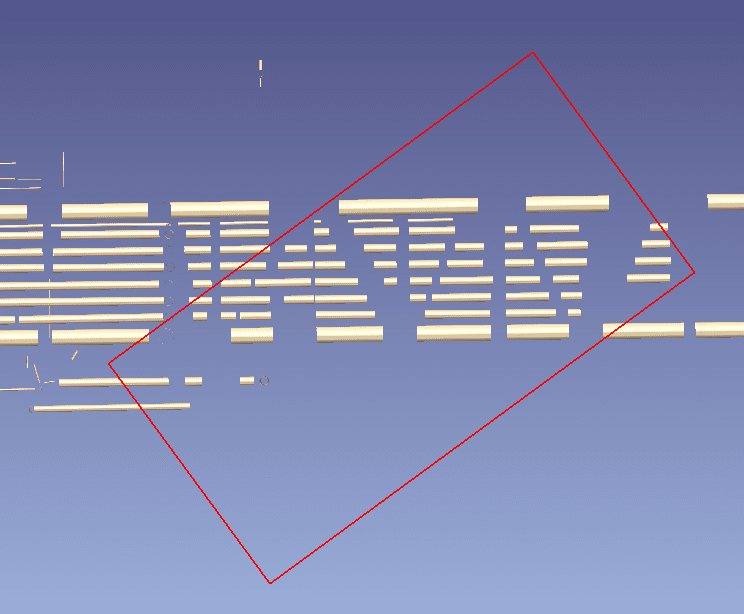
Use the X, Y, or Z buttons in the view tab before applying a Clip. This will ensure that your clip isn’t diagonal.
If you wish to edit your current clip, click Edit. A edit box with manipulation orbs will appear that allow you to edit the x,y, and z values of the clip. Click the Edit checkbox again. A dialogue box will appear asking if you would like to return to your previous camera position. Click Yes or No, and then feel free to continue your workflow.
If you wish to un-apply the current Clipping box, click the Apply checkbox. Your clipping box will disappear. If you wish to reapply your clipping box, check the Apply box.
Pressing the Reset button will expand your clipping box to the extends of your model.
For more information on the View Tab and Navigation view this article.
2 out of 5 stars
1 rating
| 5 Stars | 0% | |
| 4 Stars | 0% | |
| 3 Stars | 0% | |
| 2 Stars | 100% | |
| 1 Stars | 0% |