Search Knowledge Base by Keyword
Getting Started
This article will cover how to create custom standards for your piping models in EdgeWise. For some projects, you may require standards that EdgeWise does not include by default. In this case you will want to add your own custom standards using the Pipe Standard Editor tool within EdgeWise. Custom Standards will not export over to certain deliverables. If you are exporting with the Plant3D, PCF, or PDMS formats, some of your custom items WILL NOT export to your deliverable. For these formats, you must use ASME or DIN default specs within EdgeWise. Additionally, we do not support custom valves or flanges for these export options.
Export a Reference Standard
First, begin by exporting an existing standard within EdgeWise. Click on the File tab, then click Pipe Standard Editor. The Standard Editor dialogue box should appear.
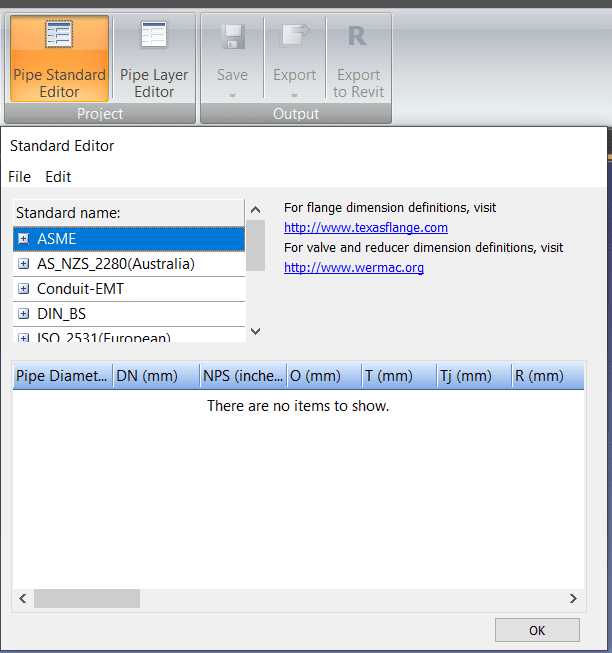
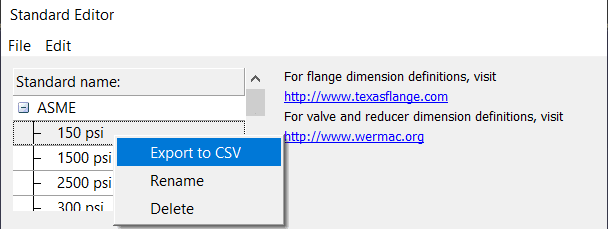
Next, export the standard that is closest to your desired standard. The ASME standard is the only EdgeWise standard that natively includes Valve information. To export, click the + button next to the spec name, right click the pressure rating you would like to export, then click Export to CSV.
Open the CSV file after saving and make your edits necessary for your custom standard. Once completed, you’ll need to import that new standard back into EdgeWise.
Importing Your New Standard
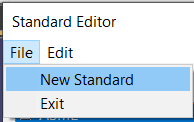
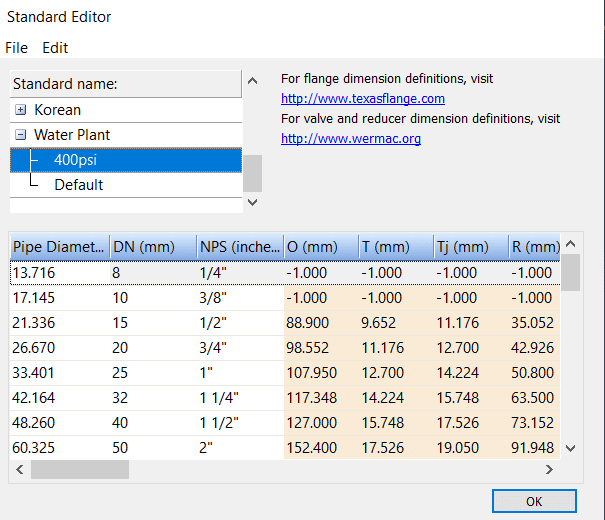
Start by making a new standard inside of the Standard Editor. Click File, then New Standard, and name your new standard.
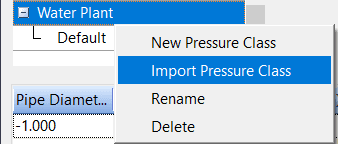
A Default pressure rating will have been made, this MUST stay here.
Next, right click your new standard (in this example I named my standard Water Plant), and click Import Pressure Class.
This will open a File Explorer window. Search for your edited CSV standard file, name it, and click Open.
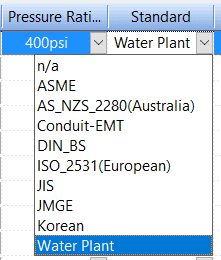
Your new piping standard will now appear in the Standard Editor as well as your Chain Info Smartsheet standard options.
Important notes regarding Custom Pipe Standards:
- Custom Valves and flanges will only export into AutoCAD.
- Do not change or edit the number or Columns in the spreadsheet. **Specifically, do not add or remove any of the different valves.
- Once a standard is applied, those changes cannot be overridden by applying a different spec. Applying a spec will adjust a pipe’s diameter; this essentially rounds off the decimal places to the closest nominal pipe size. Once this has been done once, it cannot be done again. Ensure you apply the correct spec the first time, and Save As before starting to apply standards. Also ensure you Save As often during this process.
- For any empty slots in your custom standard, insert -1.0 and EdgeWise will ignore that slot.
The different columns for the valves only represent the length of the valve. The flanges are represented based on the Texasflanges website that is linked in the editor.
Pro Tip: Create a custom “conduit” standard to apply to all of your conduits in the pipe model