Search Knowledge Base by Keyword
-
Licensing
-
General
-
Process Scans
-
Piping
-
Structure
-
Ducting
-
Cable Trays
-
- Articles coming soon
-
- Articles coming soon
-
Building
-
Exports
-
Point Clouds
0 out of 5 stars
| 5 Stars | 0% | |
| 4 Stars | 0% | |
| 3 Stars | 0% | |
| 2 Stars | 0% | |
| 1 Stars | 0% |
Getting Started
This article will cover how to use the Split Tool within the piping module. There are multiple scenarios where the Split Tool may be used. Using this tool allows for a long list of advanced workflows, especially complex piping or when there is poor point cloud data.
Using the Split Tool
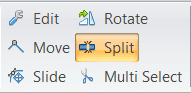
To activate this tool simply click the Split button in the Piping tab. Alternatively, you can click the B key on your keyboard.
Once this tool is active, you can click any number of times along a pipe to create invisible breaks in the pipe. To see where these breaks are, simply use the Edit (E) tool to select a section between breaks.

From here you can delete sections of the pipe or copy and paste certain sections for more advanced workflows. For example, this is a common tool for making a reducing elbow workaround.
0 out of 5 stars
| 5 Stars | 0% | |
| 4 Stars | 0% | |
| 3 Stars | 0% | |
| 2 Stars | 0% | |
| 1 Stars | 0% |