Search Knowledge Base by Keyword
Getting Started
This article will cover how to resolve EdgeWise not opening after showing the splash screen. After double-clicking the EdgeWise shortcut or running the executable in another way, EdgeWise will pull the license successfully, show the Splash Screen, and appear in the Task Manager. However, once the Splash Screen disappears, EdgeWise doesn’t open and it is no longer active in the Task Manager.
Solution
There have been two ways to resolve this issue thus far. One is used when the user machine is local and being used directly while the other is used when working in an RDP environment (ie the user is using Remote Desktop into a separate machine to use EdgeWise).
If you are local on the machine, open your Nvidia Control Panel. This can be done by searching in your Windows Search bar for Nvidia Control Panel.
From here, under 3D Settings, click Manage 3D settings and click the second tab, Program Settings.
You should be here:
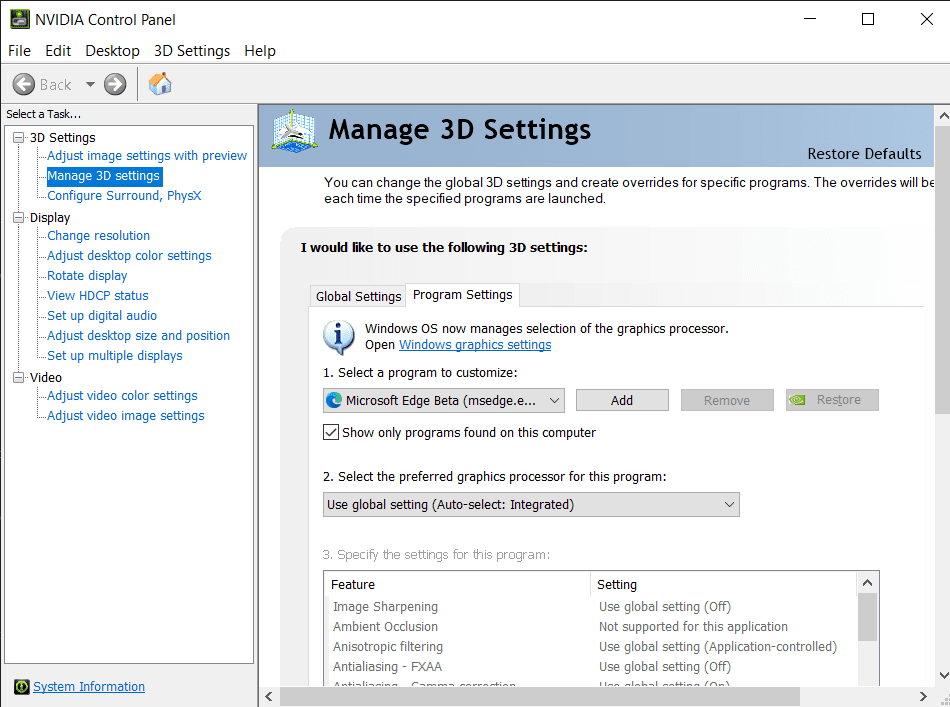
Click the Add button next to the first dropdown menu. From here, navigate to the following folder path: C:\Program Files\ClearEdge3D\EdgeWise
Select the EdgeWise.exe to add it to this program list. From here, change the second dropdown from Use global setting to High-Performance NVIDIA Processor.
Try opening EdgeWise again and see if it opens. If it does not, please contact support@clearedge3d.com.
RDP Solution
If your user is using Remote Desktop to access the machine that is using EdgeWise, we’ll need to implement a more complicated fix. The steps below are what was specifically implemented on a user’s environment to resolve this issue. While these exact steps may not result in a fix for the end user in your case, the important aspect is ensuring that RDP is set to be able to use the Dedicated Graphics Driver. This is similar to what we did above, however, this will be on a Group Policy Level.
The RDP session by default uses a “light footprint” remote session video driver and cannot interact with the high end graphics card and display the application properly so it shuts down.
You can force the interaction with the high end graphics card using the LOCAL GROUP POLICY edits below:
- On target machine (the machine you are remoting into) type gpedit.msc in the search window next to the start menu button.
- Enter Admin credentials.
- Browse to Computer Configuration/Administrative Templates/ Windows Components/Remote Desktop Services/Remote Desktop Session Host/Remote Session Environment.
- Click on RemoteFX for Windows Server 2008 R2 folder.
- Double click the following settings in the window and clicking the Enabled radio button then clicking OK
- Configure RemoteFX
- Optimize Visual Experience when using RemoteFX
- Optimize visual experience for Remote Desktop Service Sessions
- Verify the State column says Enabled for the targets listed above.
- Back out one level to the root of the Remote Session Environment folder.
- Double click the following settings in the window and clicking the Enabled radio button then clicking OK
- Use hardware graphics adapters for all Remote Desktop Services Sessions.
- Configure compression for RemoteFX data.
- Verify the State column says Enabled for the targets listed above.
- Close out of the Local Group Policy Editor.
- Reboot the machine to apply the configured policies.
- Have customer test application via RDP.